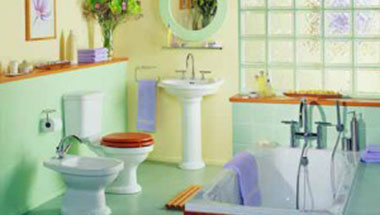
Ever get tired of the same old decor in your bathroom? There's more you can do than just splash a new coat of paint on the walls or hang a new picture above the toilet. Try out some new styles just for the fun of it when you have a weekend free. Who knows, you might find you like it.
The sponge and stencil technique
Visit a craft store sometime and check out their selection of stencils. It seems like there are a million styles out there, which won't make your decision any easier. You can also make your own by cutting shapes out of sheets of plastic or cardstock. It's best if the material you use has a bit of weight to it. Some of the most popular bathroom stencils include seashells, clovers, hearts, and flowers. And remember that you don't have to pick one and stick with it through the whole bathroom. Choose a few--one as a border to the counter, one opposite the door, one around the window, etc. One interior designer suggested that if you choose a tropical theme, "You could have such shapes as fish, suns, sunglasses, and waves."
Once you've chosen your stencil, assemble your painting tools, which should include sponges cut into two-inch squares. Tape the stencil to the wall to hold it in place, dip your sponge in the paint, and then dab it onto a paper towel or piece of paper to thin the paint. Stop dabbing when you get your desired look. Remember that the point of sponging is to get a textured look. Be gentle when you remove and relocate your stencil. Wipe it clean to prevent the paint from tainting your fresh surface.
Bring in nature
Silk vines and flowers can bring a little of the outdoors into your bathroom. For instance, try cutting the stems from silk flowers or vines and gluing them to the corners of cabinets. And what about the insides? You don't have to leave the inside of the cabinet doors plain. Instead of gluing, you might choose velcro. Get some industrial strength velcro that won't peel away from the wood after a few uses and attach half to the flower, half to the cabinet.
Mirror, Mirror
Adding mirrors to the walls can help make a small bathroom feel bigger. It also will provide you with all the angles you need to do makeup or your hair. Maybe try a mirror mosaic on the wall with different sized or shaped mirrors. Don't let them quite touch. You could also add a mirror border to your main mirror above the sink.
Interior Decorating and Remodeling News Brought to You by EZSnapCovers.com
Source: newsfix.ca/2013/12/02/interior-design-bathroom-cabinet-decorating-ideas/
1080 Bassett Rd Unit D
Westlake, OH 44145 USA
Phone:
866.740.0005
Fax:
888.717.9751
Email:
support@ezsnapcovers.com
© 2024 EZ Snap Covers.
Powered by Shopify
Measure the height from the floor to the top of the metal wall plate.
Follow our guide for baseboard heater cover measurement:
Any baseboard larger than 7 3/8" (188 mm) will be compatible with our standard cover.
Any measurement greater than 9 3/8" (238 mm) will fit our tall cover.
Measure from the bottom of the finned tube heating element to the top of the metal wall plate,
A measurement of 5 1/2" to 6 3/4" (140 mm – 172 mm) will fit our standard cover.
A measurement of 7 1/2" to 8 3/4" (191 mm – 222 mm) will fit our tall cover.
Measure the distance from the wall or the metal wall plate attached to the wall, to the outside of the finned tube heating element.
Any measurement of less than 3 1/8" (76 mm) inches from the wall will fit our
standard cover.
Any measurement of less than 3 1/8" (76 mm) inches from the wall will fit our tall cover.
EZ Snap™ Wall Widgets are used when your old or existing wall back plate has been removed or if you have to hang your new cover 1 inch or higher to bring them up to a height that will fit our installation guidelines. Just measure your overall desired height, subtract 1", drill a hole, preferably in a stud and attach it to the wall with the included screw.
EZ Snap™ Floor Fidgets easily raise your new covers ¾ inch to compensate for any ¾ inch floor (wood, tile, or other) that has been installed any time since your baseboard heater was originally installed. May be used for any reason when the overall height has been shortened and the total height is less than 7-½ inches for standard height or 9-½ inches for the TALL height EZ Snap™ BaseBoard Covers. Just use the self-tapping screws to secure them to the top of your existing wallplate.
EZ Snap™ Wall Contraptions are used when your wall back plate has been completely removed. EZ Snap™ Wall Contraptions receives your EZ Snap™ BaseBoard Cover and keeps your aluminum fin tube from sagging. These completely replace your wall back plate. To install, slide up from the bottom and make sure the top is at your desired height. Screw to the wall, then bend the front finger up to hold the fin tube in place.
Measure from wall to wall and subtract ½ inch (to allow for wiggle room when installing your new covers.) The endcaps can be pulled or slid ½ inch outward on either end to fit your existing length requirements. Choose 2 flush to wall end caps.
Measure the overall length of the existing unit with ends attached then subtract ½ inch (to allow for wiggle room when installing your new covers.) The endcaps can be pulled or slid ½ inch outward on either end to fit your existing length requirements. Choose 2 Closed or Open-end caps.
Measure from the corner to the end of the unit with ends attached then subtract ½ inch (to allow for wiggle room when installing your new covers.) The endcaps can be pulled or slid ½ inch outward on either end to fit your existing length requirements. Choose 1 Closed or Open-end & 1 flush to wall end cap.
Measure the left side from corner A to corner B (see diagram). Then subtract 3 inches for the 90 degree inside corner, then subtract another ½ inch (to allow for wiggle room when installing your new covers.) Repeat for the right side if also wall to wall. You need to subtract a total of 3½ inches from each side that is wall to wall. Choose your end caps.
Measure the left side from the corner of the wall to the end of the unit with ends caps. Then subtract 3 inches for the 90 degree inside corner, then subtract another ½ inch (to allow for wiggle room when installing your new covers.) Repeat for the right side. You need to subtract a total of 3½ inches from both left and right sides. Choose your end caps.
L-Shaped outside radiators ending in the middle of the wall:
Measure from outside corner of the wall A to the end of the radiator unit with end caps attached B, then subtract ½" (to allow for wiggle room when installing your new covers.)
Measure from outside corner of the wall to the corner of the wall, then subtract 1/2" (to allow for wiggle room when installing your new covers.)
Left leg - measure from the corner out to the end of the radiator subtract 3" for the corner and ½ (to allow for wiggle room when installing your new covers.)
Center leg - measure from corner to corner and subtract 3" for each corner a total of 6"
Right leg - measure from the corner out to the end of the radiator subtract 3" for the corner and ½" (to allow for wiggle room when installing your new covers.).
We recommend that you order covers a little longer than normal and cut them on site, as there are many opportunities for mistakes in measuring and installation. By cutting on site you can fit and cut to fit. The covers can be cut with a good quality jigsaw and a fine metal cutting blade.
Now that you’ve learned how to measure baseboard heaters,
you’re ready to order.