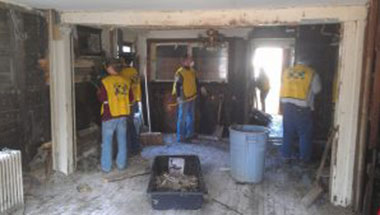
Home remodeling is hard enough when it’s just you all by your lonesome. It’s exponentially harder when you have a significant other, some kids, and maybe a couple of pets around as well. For a large remodeling project, your home will be temporarily transformed into a construction zone. If you’re not worried about your kids running through an active construction site, you should be. There may be live machinery, open crevices, and sharp objects lying about so if you’re planning on staying put during the course of the remodel to save money, you need to make some considerations about how to keep everyone alive and in good health during the project.
Have a plan in place
Panic never helped anything. You need to be calm, prepared, and proactive about a remodel. Before any work starts you’ll want to lay down ground rules for everybody, and not just the kids. All adults in the household need to be on the same page and that includes workers. If you have a general contractor, discuss any safety concerns with him/her and make sure the home is as safe as possible during the project.
It may get loud
The loud noises that tend to accompany major remodeling projects aren’t conducive for nap times so a home remodel might mean that your daily routine will be altered. It may be that the particularly loud parts of the project can be limited to certain times of the day, you’ll have to discuss that with the contractor. If not, or if it’s easier, you can arrange with a family member or friend to have the children out of the house for certain parts of the project.
Don’t sleep in dust
Dust can aggravate health conditions like asthma and even perfectly healthy children can suffer if there’s too much dust in the air. It’s crucial that you protect inside air quality so seal off HVAC ducting and vents in the rooms where the work is going on and use plenty of plastic sheeting to limit flying particles. Keep workspaces clean by using disposable cloths. Use a HEPA filtered vacuum daily to minimize dust.
Watch out for waste
Debris piles can contain sharp glass, nails, or other hazards so discuss with your contractor ways to keep your kids safe. They should know which rooms are off limits but as a precaution there should be dedicated bins or containers for any hazardous materials to keep them out of reach.
Tools are not toys
Stress to your contractor how important it is for tools to be unplugged and put away when not in use. This really comes down to the workers following your rules but you should also stress to your children, if they’re old enough, that tools are not toys.
If you’re stressed out just reading this, you may want to reconsider just putting the whole family up in a hotel. The cost may be worth your sanity.
Source: Wisc News
1080 Bassett Rd Unit D
Westlake, OH 44145 USA
Phone:
866.740.0005
Fax:
888.717.9751
Email:
support@ezsnapcovers.com
© 2025 EZ Snap Covers.
Powered by Shopify
Measure the height from the floor to the top of the metal wall plate.
Follow our guide for baseboard heater cover measurement:
Any baseboard larger than 7 3/8" (188 mm) will be compatible with our standard cover.
Any measurement greater than 9 3/8" (238 mm) will fit our tall cover.
Measure from the bottom of the finned tube heating element to the top of the metal wall plate,
A measurement of 5 1/2" to 6 3/4" (140 mm – 172 mm) will fit our standard cover.
A measurement of 7 1/2" to 8 3/4" (191 mm – 222 mm) will fit our tall cover.
Measure the distance from the wall or the metal wall plate attached to the wall, to the outside of the finned tube heating element.
Any measurement of less than 3 1/8" (76 mm) inches from the wall will fit our
standard cover.
Any measurement of less than 3 1/8" (76 mm) inches from the wall will fit our tall cover.
EZ Snap™ Wall Widgets are used when your old or existing wall back plate has been removed or if you have to hang your new cover 1 inch or higher to bring them up to a height that will fit our installation guidelines. Just measure your overall desired height, subtract 1", drill a hole, preferably in a stud and attach it to the wall with the included screw.
EZ Snap™ Floor Fidgets easily raise your new covers ¾ inch to compensate for any ¾ inch floor (wood, tile, or other) that has been installed any time since your baseboard heater was originally installed. May be used for any reason when the overall height has been shortened and the total height is less than 7-½ inches for standard height or 9-½ inches for the TALL height EZ Snap™ BaseBoard Covers. Just use the self-tapping screws to secure them to the top of your existing wallplate.
EZ Snap™ Wall Contraptions are used when your wall back plate has been completely removed. EZ Snap™ Wall Contraptions receives your EZ Snap™ BaseBoard Cover and keeps your aluminum fin tube from sagging. These completely replace your wall back plate. To install, slide up from the bottom and make sure the top is at your desired height. Screw to the wall, then bend the front finger up to hold the fin tube in place.
Measure from wall to wall and subtract ½ inch (to allow for wiggle room when installing your new covers.) The endcaps can be pulled or slid ½ inch outward on either end to fit your existing length requirements. Choose 2 flush to wall end caps.
Measure the overall length of the existing unit with ends attached then subtract ½ inch (to allow for wiggle room when installing your new covers.) The endcaps can be pulled or slid ½ inch outward on either end to fit your existing length requirements. Choose 2 Closed or Open-end caps.
Measure from the corner to the end of the unit with ends attached then subtract ½ inch (to allow for wiggle room when installing your new covers.) The endcaps can be pulled or slid ½ inch outward on either end to fit your existing length requirements. Choose 1 Closed or Open-end & 1 flush to wall end cap.
Measure the left side from corner A to corner B (see diagram). Then subtract 3 inches for the 90 degree inside corner, then subtract another ½ inch (to allow for wiggle room when installing your new covers.) Repeat for the right side if also wall to wall. You need to subtract a total of 3½ inches from each side that is wall to wall. Choose your end caps.
Measure the left side from the corner of the wall to the end of the unit with ends caps. Then subtract 3 inches for the 90 degree inside corner, then subtract another ½ inch (to allow for wiggle room when installing your new covers.) Repeat for the right side. You need to subtract a total of 3½ inches from both left and right sides. Choose your end caps.
L-Shaped outside radiators ending in the middle of the wall:
Measure from outside corner of the wall A to the end of the radiator unit with end caps attached B, then subtract ½" (to allow for wiggle room when installing your new covers.)
Measure from outside corner of the wall to the corner of the wall, then subtract 1/2" (to allow for wiggle room when installing your new covers.)
Left leg - measure from the corner out to the end of the radiator subtract 3" for the corner and ½ (to allow for wiggle room when installing your new covers.)
Center leg - measure from corner to corner and subtract 3" for each corner a total of 6"
Right leg - measure from the corner out to the end of the radiator subtract 3" for the corner and ½" (to allow for wiggle room when installing your new covers.).
We recommend that you order covers a little longer than normal and cut them on site, as there are many opportunities for mistakes in measuring and installation. By cutting on site you can fit and cut to fit. The covers can be cut with a good quality jigsaw and a fine metal cutting blade.
Now that you’ve learned how to measure baseboard heaters,
you’re ready to order.