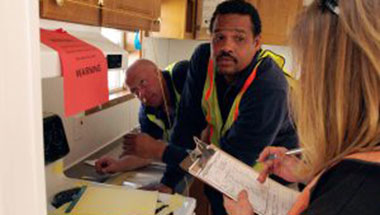
TV shows tend to make remodeling look easier than it really is, especially when the professionals swoop in and do all the work. But any homeowner who has been involved in the remodeling process themselves will tell you that it’s anything but easy. Home remodeling is complex and will almost always require some degree of involvement for the homeowner even when professionals are involved. Here are a few tips to ensure that a home remodel is successful.
Get expert help
Because of television networks like HGTV and DIY, many homeowners are tricked into believing they’re more capable than they really are when it comes to home improvement projects. A good first step is to evaluate your own abilities and be realistic about which projects you can do on your own with a little help from YouTube instructional videos and which projects should be left to professionals. There are a few tasks that should always be left to professionals such as electrical and plumbing work as well as any project that will require structural changes to the home.
Set a budget
Whether your project is relatively small (a fresh coat of paint and some new window treatments that will cost a few hundred dollars) or huge (a total kitchen makeover that will cost tens of thousands of dollars) it’s important to have a realistic budget for the project before work begins. Going into a remodel with an open-ended budget is a recipe for disaster. So crunch the numbers and come up with an estimate that is reasonable and do your best to stick to it. Experts recommend setting aside an extra 15 to 20% more than you think it will cost as a contingency fund for when things don’t go according to plan.
Consider the time frame
Just as you’ll want to have a realistic expectation of what it’s going to cost, you should have a realistic expectation of how long it’s going to take. Some projects can be done in as little as one or two days while major remodeling projects can stretch on and on for weeks. If you’re working with a contractor, you should ask for and receive a written estimate that will not only include the anticipated costs associated with the project but an estimated timeframe as well. As with your budget, estimate high and then round up just to be safe. You may want to make arrangements to stay out of the home during a major remodel.
Communicate expectations
Whether you plan to be more hands-on or you’re pretty much leaving it up to the contractors, you need to communicate to anyone who is helping with the project exactly what it is you want. You should have detailed plans drawn up before any work begins. If there will be multiple contractors, consider hiring a general contractor to oversee the subcontractors and coordinate schedules.
Source: HJ News
1080 Bassett Rd Unit D
Westlake, OH 44145 USA
Phone:
866.740.0005
Fax:
888.717.9751
Email:
support@ezsnapcovers.com
© 2024 EZ Snap Covers.
Powered by Shopify
Measure the height from the floor to the top of the metal wall plate.
Follow our guide for baseboard heater cover measurement:
Any baseboard larger than 7 3/8" (188 mm) will be compatible with our standard cover.
Any measurement greater than 9 3/8" (238 mm) will fit our tall cover.
Measure from the bottom of the finned tube heating element to the top of the metal wall plate,
A measurement of 5 1/2" to 6 3/4" (140 mm – 172 mm) will fit our standard cover.
A measurement of 7 1/2" to 8 3/4" (191 mm – 222 mm) will fit our tall cover.
Measure the distance from the wall or the metal wall plate attached to the wall, to the outside of the finned tube heating element.
Any measurement of less than 3 1/8" (76 mm) inches from the wall will fit our
standard cover.
Any measurement of less than 3 1/8" (76 mm) inches from the wall will fit our tall cover.
EZ Snap™ Wall Widgets are used when your old or existing wall back plate has been removed or if you have to hang your new cover 1 inch or higher to bring them up to a height that will fit our installation guidelines. Just measure your overall desired height, subtract 1", drill a hole, preferably in a stud and attach it to the wall with the included screw.
EZ Snap™ Floor Fidgets easily raise your new covers ¾ inch to compensate for any ¾ inch floor (wood, tile, or other) that has been installed any time since your baseboard heater was originally installed. May be used for any reason when the overall height has been shortened and the total height is less than 7-½ inches for standard height or 9-½ inches for the TALL height EZ Snap™ BaseBoard Covers. Just use the self-tapping screws to secure them to the top of your existing wallplate.
EZ Snap™ Wall Contraptions are used when your wall back plate has been completely removed. EZ Snap™ Wall Contraptions receives your EZ Snap™ BaseBoard Cover and keeps your aluminum fin tube from sagging. These completely replace your wall back plate. To install, slide up from the bottom and make sure the top is at your desired height. Screw to the wall, then bend the front finger up to hold the fin tube in place.
Measure from wall to wall and subtract ½ inch (to allow for wiggle room when installing your new covers.) The endcaps can be pulled or slid ½ inch outward on either end to fit your existing length requirements. Choose 2 flush to wall end caps.
Measure the overall length of the existing unit with ends attached then subtract ½ inch (to allow for wiggle room when installing your new covers.) The endcaps can be pulled or slid ½ inch outward on either end to fit your existing length requirements. Choose 2 Closed or Open-end caps.
Measure from the corner to the end of the unit with ends attached then subtract ½ inch (to allow for wiggle room when installing your new covers.) The endcaps can be pulled or slid ½ inch outward on either end to fit your existing length requirements. Choose 1 Closed or Open-end & 1 flush to wall end cap.
Measure the left side from corner A to corner B (see diagram). Then subtract 3 inches for the 90 degree inside corner, then subtract another ½ inch (to allow for wiggle room when installing your new covers.) Repeat for the right side if also wall to wall. You need to subtract a total of 3½ inches from each side that is wall to wall. Choose your end caps.
Measure the left side from the corner of the wall to the end of the unit with ends caps. Then subtract 3 inches for the 90 degree inside corner, then subtract another ½ inch (to allow for wiggle room when installing your new covers.) Repeat for the right side. You need to subtract a total of 3½ inches from both left and right sides. Choose your end caps.
L-Shaped outside radiators ending in the middle of the wall:
Measure from outside corner of the wall A to the end of the radiator unit with end caps attached B, then subtract ½" (to allow for wiggle room when installing your new covers.)
Measure from outside corner of the wall to the corner of the wall, then subtract 1/2" (to allow for wiggle room when installing your new covers.)
Left leg - measure from the corner out to the end of the radiator subtract 3" for the corner and ½ (to allow for wiggle room when installing your new covers.)
Center leg - measure from corner to corner and subtract 3" for each corner a total of 6"
Right leg - measure from the corner out to the end of the radiator subtract 3" for the corner and ½" (to allow for wiggle room when installing your new covers.).
We recommend that you order covers a little longer than normal and cut them on site, as there are many opportunities for mistakes in measuring and installation. By cutting on site you can fit and cut to fit. The covers can be cut with a good quality jigsaw and a fine metal cutting blade.
Now that you’ve learned how to measure baseboard heaters,
you’re ready to order.