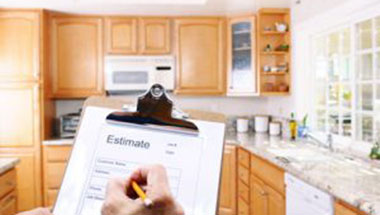
The majority of remodels end up going over-budget. At best, you end up spending more than you thought you would and money is tight for a bit while you play catch up. At worst, you run out of money before the project is completed and can’t pay your contractors. Then you’re stuck living in a construction site while you scramble to come up with some more money to get the job finished. You don’t want this remodeling nightmare to happen to you so here are some finance tips for your next home remodel.
Compile your wish list
Start out thinking about the remodel as if cost wasn’t a factor. Then start thinking about the cost of the various things you’d like to do. From there, narrow down your list to those things that are the biggest priority for you and your lifestyle.
Carefully select your contractor
Don’t hire the first contractor who makes a bid, even if the price is right. Get at least a few estimates and compare them. Don’t automatically go with the lowest. Go with the best value, even it will cost you a little more. Don’t be afraid to haggle prices with the contractor.
Set a budget and stick to it
Never you into a remodel with an open-ended budget. Work with your contractor to determine an accurate and realistic budget for the work you want done. As the project gets underway, don’t start adding on to its scope. Stick with your original plans.
Prepare for contingencies
Never assume that everything will go smoothly because in all likelihood, it won’t. Whatever your budget is, increase it by 10-15% so you have a little extra when the contractor says "uh oh."
Review the contract before signing it
Any reputable contractor will give you a contract in writing before work begins. Don’t just sign on the dotted line. Read over it. Make sure you understand everything and that you are in agreement with it. If there are discrepancies between what you’ve envisioned and what is planned, or if the cost is more than you anticipated, discuss it with the contractor before signing.
Understand how you’ll be paying
Most contractors will take a down payment before getting started and you’ll pay the rest in installments throughout the project. Never pay 100% up front. Find out the payment schedule before work begins and make sure that payments are always tied to milestones in the project, not arbitrary dates regardless of how much the contractor has actually accomplished.
Save all your receipts
Keep track of all your receipts. If you’re the type of person who frequently misplaces things, consider scanning them into a digital document so you can pull them up on your computer. This may be a lifesaver if there’s ever a discrepancy in cost between you and the contractor.
Source: Nola
1080 Bassett Rd Unit D
Westlake, OH 44145 USA
Phone:
866.740.0005
Fax:
888.717.9751
Email:
support@ezsnapcovers.com
© 2024 EZ Snap Covers.
Powered by Shopify
Measure the height from the floor to the top of the metal wall plate.
Follow our guide for baseboard heater cover measurement:
Any baseboard larger than 7 3/8" (188 mm) will be compatible with our standard cover.
Any measurement greater than 9 3/8" (238 mm) will fit our tall cover.
Measure from the bottom of the finned tube heating element to the top of the metal wall plate,
A measurement of 5 1/2" to 6 3/4" (140 mm – 172 mm) will fit our standard cover.
A measurement of 7 1/2" to 8 3/4" (191 mm – 222 mm) will fit our tall cover.
Measure the distance from the wall or the metal wall plate attached to the wall, to the outside of the finned tube heating element.
Any measurement of less than 3 1/8" (76 mm) inches from the wall will fit our
standard cover.
Any measurement of less than 3 1/8" (76 mm) inches from the wall will fit our tall cover.
EZ Snap™ Wall Widgets are used when your old or existing wall back plate has been removed or if you have to hang your new cover 1 inch or higher to bring them up to a height that will fit our installation guidelines. Just measure your overall desired height, subtract 1", drill a hole, preferably in a stud and attach it to the wall with the included screw.
EZ Snap™ Floor Fidgets easily raise your new covers ¾ inch to compensate for any ¾ inch floor (wood, tile, or other) that has been installed any time since your baseboard heater was originally installed. May be used for any reason when the overall height has been shortened and the total height is less than 7-½ inches for standard height or 9-½ inches for the TALL height EZ Snap™ BaseBoard Covers. Just use the self-tapping screws to secure them to the top of your existing wallplate.
EZ Snap™ Wall Contraptions are used when your wall back plate has been completely removed. EZ Snap™ Wall Contraptions receives your EZ Snap™ BaseBoard Cover and keeps your aluminum fin tube from sagging. These completely replace your wall back plate. To install, slide up from the bottom and make sure the top is at your desired height. Screw to the wall, then bend the front finger up to hold the fin tube in place.
Measure from wall to wall and subtract ½ inch (to allow for wiggle room when installing your new covers.) The endcaps can be pulled or slid ½ inch outward on either end to fit your existing length requirements. Choose 2 flush to wall end caps.
Measure the overall length of the existing unit with ends attached then subtract ½ inch (to allow for wiggle room when installing your new covers.) The endcaps can be pulled or slid ½ inch outward on either end to fit your existing length requirements. Choose 2 Closed or Open-end caps.
Measure from the corner to the end of the unit with ends attached then subtract ½ inch (to allow for wiggle room when installing your new covers.) The endcaps can be pulled or slid ½ inch outward on either end to fit your existing length requirements. Choose 1 Closed or Open-end & 1 flush to wall end cap.
Measure the left side from corner A to corner B (see diagram). Then subtract 3 inches for the 90 degree inside corner, then subtract another ½ inch (to allow for wiggle room when installing your new covers.) Repeat for the right side if also wall to wall. You need to subtract a total of 3½ inches from each side that is wall to wall. Choose your end caps.
Measure the left side from the corner of the wall to the end of the unit with ends caps. Then subtract 3 inches for the 90 degree inside corner, then subtract another ½ inch (to allow for wiggle room when installing your new covers.) Repeat for the right side. You need to subtract a total of 3½ inches from both left and right sides. Choose your end caps.
L-Shaped outside radiators ending in the middle of the wall:
Measure from outside corner of the wall A to the end of the radiator unit with end caps attached B, then subtract ½" (to allow for wiggle room when installing your new covers.)
Measure from outside corner of the wall to the corner of the wall, then subtract 1/2" (to allow for wiggle room when installing your new covers.)
Left leg - measure from the corner out to the end of the radiator subtract 3" for the corner and ½ (to allow for wiggle room when installing your new covers.)
Center leg - measure from corner to corner and subtract 3" for each corner a total of 6"
Right leg - measure from the corner out to the end of the radiator subtract 3" for the corner and ½" (to allow for wiggle room when installing your new covers.).
We recommend that you order covers a little longer than normal and cut them on site, as there are many opportunities for mistakes in measuring and installation. By cutting on site you can fit and cut to fit. The covers can be cut with a good quality jigsaw and a fine metal cutting blade.
Now that you’ve learned how to measure baseboard heaters,
you’re ready to order.