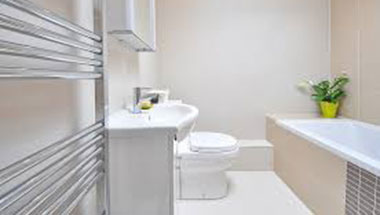
Of all the rooms in the home, the bathroom might be the most difficult to remodel. The reason it’s so hard to get a bathroom remodel just right is because it’s such a small space to work with and you have to make it both functional and aesthetically pleasing. So despite being such a small room, plan on spending more to remodel your bathroom than you would on remodeling a bedroom or home office. Here are five bathroom design ideas that you may want to try when you remodel.
Make use of every bit of space
Since space is limited in all but the largest of bathrooms, it’s crucial that you make the most out of every square inch. If the bathroom is large enough for a vanity as opposed to a pedestal sink, have one installed because everyone will appreciate the storage space beneath the sink. If you have to go with a pedestal sink then you’ll have to find other creative storage solutions. One option is to hang shelves to add some storage space on the walls themselves. An even better option is to make use of the space between the walls since that space is just there unused anyways. To do this, cut away a section of the dry wall and install shelves between the studs. Since the shelves will only be as deep as the studs, it won’t give you a ton of space but you can store some smaller items. Paint or tile the newly created storage space, hang a cabinet door, and you’ve created additional storage where there used to be a wall.
Go with a neutral color palette
Remember that it’s much easier to swap out colors in the form of new linens and accessories than it is to replace the shower, sink, or fixtures. With that in mind, you should aim to use a neutral color palette that can work with any color scheme. It will be easier for you to decorate your bathroom and it will be easier to sell your home when the time comes. White is always a safe choice and it won’t look bland when you use towels, rugs, and other accessories to add in bright colors.
Have plenty of lighting
Good lighting is crucial for the bathroom because of all the grooming tasks that take place there. Applying makeup, shaving, and hair styling require a lot of light. A single light fixture above the vanity won’t cut it. You should install overhead lighting and you may even want to have some decorative sconce lighting on the sides of the mirror as well.
Have a shower that meets everyone’s needs
If the bathroom you’re remodeling has a shower in it, you should make sure it can meet the needs of everyone who may be using it. If you have older family members or family members with limited mobility, it’s important to have a shower bench and hand rails installed. A low threshold is also a good idea so it’s easier to get in and out. A detachable shower-head is more versatile than one that stays in place since people can bring the water closer to themselves. It also makes it easier to clean your shower.
Install a pocket door
For very small bathrooms, consider installing a pocket door. If your door swings inward on hinges, it’s going to take up valuable real estate when the door is open and it can be a pain to squeeze in, get out of the way of the door, and close it. A pocket door, on the other hand, slides into the space between the walls. When the bathroom is not in use, the space can be opened up without detracting from the square footage.
Source: RIS Media
1080 Bassett Rd Unit D
Westlake, OH 44145 USA
Phone:
866.740.0005
Fax:
888.717.9751
Email:
support@ezsnapcovers.com
© 2024 EZ Snap Covers.
Powered by Shopify
Measure the height from the floor to the top of the metal wall plate.
Follow our guide for baseboard heater cover measurement:
Any baseboard larger than 7 3/8" (188 mm) will be compatible with our standard cover.
Any measurement greater than 9 3/8" (238 mm) will fit our tall cover.
Measure from the bottom of the finned tube heating element to the top of the metal wall plate,
A measurement of 5 1/2" to 6 3/4" (140 mm – 172 mm) will fit our standard cover.
A measurement of 7 1/2" to 8 3/4" (191 mm – 222 mm) will fit our tall cover.
Measure the distance from the wall or the metal wall plate attached to the wall, to the outside of the finned tube heating element.
Any measurement of less than 3 1/8" (76 mm) inches from the wall will fit our
standard cover.
Any measurement of less than 3 1/8" (76 mm) inches from the wall will fit our tall cover.
EZ Snap™ Wall Widgets are used when your old or existing wall back plate has been removed or if you have to hang your new cover 1 inch or higher to bring them up to a height that will fit our installation guidelines. Just measure your overall desired height, subtract 1", drill a hole, preferably in a stud and attach it to the wall with the included screw.
EZ Snap™ Floor Fidgets easily raise your new covers ¾ inch to compensate for any ¾ inch floor (wood, tile, or other) that has been installed any time since your baseboard heater was originally installed. May be used for any reason when the overall height has been shortened and the total height is less than 7-½ inches for standard height or 9-½ inches for the TALL height EZ Snap™ BaseBoard Covers. Just use the self-tapping screws to secure them to the top of your existing wallplate.
EZ Snap™ Wall Contraptions are used when your wall back plate has been completely removed. EZ Snap™ Wall Contraptions receives your EZ Snap™ BaseBoard Cover and keeps your aluminum fin tube from sagging. These completely replace your wall back plate. To install, slide up from the bottom and make sure the top is at your desired height. Screw to the wall, then bend the front finger up to hold the fin tube in place.
Measure from wall to wall and subtract ½ inch (to allow for wiggle room when installing your new covers.) The endcaps can be pulled or slid ½ inch outward on either end to fit your existing length requirements. Choose 2 flush to wall end caps.
Measure the overall length of the existing unit with ends attached then subtract ½ inch (to allow for wiggle room when installing your new covers.) The endcaps can be pulled or slid ½ inch outward on either end to fit your existing length requirements. Choose 2 Closed or Open-end caps.
Measure from the corner to the end of the unit with ends attached then subtract ½ inch (to allow for wiggle room when installing your new covers.) The endcaps can be pulled or slid ½ inch outward on either end to fit your existing length requirements. Choose 1 Closed or Open-end & 1 flush to wall end cap.
Measure the left side from corner A to corner B (see diagram). Then subtract 3 inches for the 90 degree inside corner, then subtract another ½ inch (to allow for wiggle room when installing your new covers.) Repeat for the right side if also wall to wall. You need to subtract a total of 3½ inches from each side that is wall to wall. Choose your end caps.
Measure the left side from the corner of the wall to the end of the unit with ends caps. Then subtract 3 inches for the 90 degree inside corner, then subtract another ½ inch (to allow for wiggle room when installing your new covers.) Repeat for the right side. You need to subtract a total of 3½ inches from both left and right sides. Choose your end caps.
L-Shaped outside radiators ending in the middle of the wall:
Measure from outside corner of the wall A to the end of the radiator unit with end caps attached B, then subtract ½" (to allow for wiggle room when installing your new covers.)
Measure from outside corner of the wall to the corner of the wall, then subtract 1/2" (to allow for wiggle room when installing your new covers.)
Left leg - measure from the corner out to the end of the radiator subtract 3" for the corner and ½ (to allow for wiggle room when installing your new covers.)
Center leg - measure from corner to corner and subtract 3" for each corner a total of 6"
Right leg - measure from the corner out to the end of the radiator subtract 3" for the corner and ½" (to allow for wiggle room when installing your new covers.).
We recommend that you order covers a little longer than normal and cut them on site, as there are many opportunities for mistakes in measuring and installation. By cutting on site you can fit and cut to fit. The covers can be cut with a good quality jigsaw and a fine metal cutting blade.
Now that you’ve learned how to measure baseboard heaters,
you’re ready to order.