Hydronic baseboard heaters offer comfortable, steady heat during cold seasons, but every homeowner runs into issues with them from time to time. If your living room is chilly or your heater is making strange noises, you're in the right place. This guide covers ten tips for troubleshooting your hydronic baseboard heater to keep your home cozy all year.
What Is a Hydronic Baseboard Heater?
Hydronic baseboard heaters use hot water to warm your home. Hot water flows through a pipe within the heater, and heat radiates into the room. This type of system is popular for its even heat distribution and quiet operation.
Main Parts of a Hydronic Baseboard Heater
-
Heating element: The central pipe that carries hot water
-
Fins: Thin metal pieces that help transfer heat from the pipe into your space
-
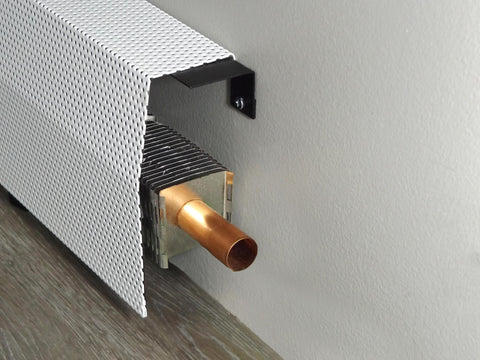
Enclosure: The metal cover that protects and hides the inner workings of the heater
Top 10 Troubleshooting Tips
Maintaining your hydronic baseboard heater doesn’t have to be complicated. By learning a few simple troubleshooting techniques, you can address common issues and keep your system running efficiently. Here are the top tips to help you troubleshoot and resolve problems with your heater.
1. Heater Not Producing Enough Heat
If the heater is not producing enough heat, start by checking the basics. Taking these measures will help troubleshoot some of the most common issues.
-
Check the thermostat: Set it higher and listen for the sound of water flow or feel for warmth. If nothing changes, there might be a thermostat or air issue.
-
Bleed the heater: Air bubbles can block hot water. The system filters the air using the bleed valve (usually found at the end of the heater). Hold a towel to catch water and open the valve slowly. When a steady stream of water flows out, close the valve.
2. Heater Makes Strange Noises
First, identify the type of noise you are dealing with. Understanding this will help determine the best way to address it.
-
Banging: Expansion and contraction of metal parts can cause this sound. Make sure the heater is securely mounted and not rubbing against the cover.
-
Gurgling: Air in the lines is usually the culprit. Bleed the heater to remove trapped air.
-
Hissing: This typically means air is escaping. Double-check all connections and bleed the heater.
3. Leaks Around the Heater
Leaks are a red flag that shouldn’t be ignored. They can indicate underlying issues that may lead to bigger problems if left unchecked.
-
Inspect connections and valves: Look for signs of water escaping around the joints, valves, and where pipes meet the heater. Tighten any loose fittings and dry the area.
-
If you spot a leak, turn off the system and place towels to absorb water. Small leaks may be handled with plumber's tape on threads, but larger leaks might mean you need a professional.
4. Uneven Heating Across the Room
When one section of the room feels colder than others, it could be due to uneven airflow. Identifying and addressing the cause can help create a more comfortable and balanced indoor environment.
-
Check for obstructions: Ensure furniture or curtains do not block the heater.
-
Ensure proper insulation: Drafts or poor insulation can cause uneven heating. Add weather stripping to windows and doors to help the heater do its job.
5. Cold Spots on the Heater
Cold spots often occur in heating systems due to airlocks, which prevent hot water from circulating properly. Another common cause is sediment buildup, which can block water flow and reduce efficiency.
-
Clear airlocks: Bleed the system. This helps push air bubbles out and gets hot water moving again.
-
Flush the system: If sediment clogs things up, you may need to flush the pipes. Turn off the heater, open the drain valve, and run water through the system.
6. Thermostat Malfunctions
If adjusting the thermostat doesn’t help, there could be an issue with its functionality. It may be faulty and require repairs or replacement.
-
Test the thermostat: Use a multimeter to check continuity, or consult your manual for specific test instructions.
-
Replace or calibrate: If the thermostat is broken, install a new one. If it’s reading temperatures incorrectly, check the manual to calibrate it.
7. Damaged Radiator Fins
The metal fins attached to your heater’s pipe are crucial in distributing heat effectively throughout the space. These fins help ensure that warmth is evenly dispersed, improving the overall efficiency of your heating system.
-
Importance of fins: They spread warmth evenly into your space.
-
Clean and straighten: Use a vacuum brush to remove dust and straighten bent fins with needle-nose pliers. Handle them gently; thin metal can snap.
8. Rust and Corrosion
Rust not only looks unsightly, but it can also cause significant damage over time. It weakens heater components, compromising their functionality and durability.
-
Prevention: Keep covers clean and dry, especially in areas prone to humidity.
-
Treat light rust: Sand small rust spots, then touch them up with heat-resistant paint.
-
Upgrade to rust-free covers: EZ Snap Covers are made with galvanized steel that resists rust and corrosion, offering a long-lasting solution that keeps your heater looking fresh.
9. High Energy Bills
If your heater uses more energy than expected, it might be time for a tune-up. Regular maintenance can help improve its efficiency and lower your energy bills.
-
Optimize for efficiency: Clear any dust, open vents fully, and keep fins in good condition to maximize heat distribution.
-
Reduce use: Lower the thermostat a degree or two, and wear a sweater to save energy.
10. Heater Covers Are Damaged
Covers protect the heater from damage and wear and ensure it stays in good condition for longer. Additionally, they help maintain the aesthetic appeal of your space by keeping everything neat and tidy.
-
Damaged covers: Dents, cracks, or rust spots on covers limit heater performance and impact home design.
-
Upgrade options: EZ Snap Covers make swapping out old covers easy. Our streamlined baseboard heater cover design and strong materials give your heater a fresh look without complicated installation.
Keep Your Hydronic Baseboard Heater Running Smoothly
Tackling these problems may feel overwhelming, but simple troubleshooting tips for hydronic baseboard heaters can restore comfort and support your heater’s lifespan. Keep up with routine checks, look out for noise or leaks, and treat small problems before they grow. Upgrading to galvanized steel baseboard heater covers like EZ Snap Covers means you don’t have to worry about rust, damage, or dated appearances. A little effort leads to big improvements in warmth and peace of mind.
Take the next step and explore EZ Snap Covers for a fast, stylish solution to damaged or outdated baseboard heater covers. Your home and your heater will thank you.


