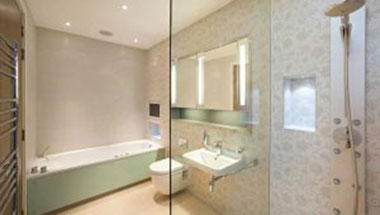
The bathroom serves a vital role in the home. You could argue that it’s the most important room in the home in many ways, at least from a functional standpoint. But despite the fact that what goes on there isn’t exactly glamorous, that doesn’t mean your bathroom has to be bland-looking. A few improvements can really make a big difference in your bathroom. Here are a few ideas you might try.
Glam lights
Do away with the single fluorescent bulb overhead. It’s a buzzkill. It literally buzzes. And it makes guests feel like they’re in a doctor’s office bathroom giving a sample. So change out the light fixture. Go with something that’s unique and artistic and really stands out. The more creative you are with light fixtures, the better.
Flashy mirrors
Most bathroom mirrors are way too boring. You don’t want a standard contractor mirror. You can pick out a mirror that really stands out or you can frame your own. For 20 bucks you can go to a local home improvement store, pick up some molding or 1x4 planks of wood, and build your own mirror frame. It should only take a couple of hours. Then paint it with a color to match the cabinets. If it’s for a kid’s bathroom, go crazy and paint it neon green, or orange, or whatever and get some accessories to match it.
Paint that pops
Since bathrooms are so small, you can break rules that you usually wouldn’t want to break in larger areas in your home. So the bathroom is a good place to be creative with color. If you’re wary about a color being too overbearing, start by using it just for the vanity and then if you decide you like it, you can paint the whole bathroom.
Funky wallpaper
Going off the tip above, you can experiment with some pretty wild wallpaper since a bathroom is a small space. If you’re renting, or if you just don’t want to be committed to the wallpaper forever, use the removable kind. If you go with crazy wallpaper, not only do you not have to paint but you can get away with not having any artwork in the bathroom as well.
Rethink the sink
The sink doesn’t have to be boring. Since most standard vanities don’t have much in the way of visual appeal, think outside the box and use an antique console, commode, or dresser and have a plumber install a sink into it. Repurposed furniture is the best furniture and it will save you some money. Just make sure you waterproof that antique dresser before you turn it into a vanity because it will get wet.
Swap out linens
White towels are for hotel rooms. Get some fresh linens to go with the new look in your bathroom. Choose colors that go with the color scheme of the bathroom. While you’re at it, you can pick up some new accessories for the bathroom as well. A new waste basket, toothbrush holder, soap dispenser, etc… can be just the finishing touch your new bathroom needs.
Smarter storage
If you’ve got a pedestal sink, and even if you don’t, your bathroom can benefit from additional storage. You can hang some shelves above the toilet or sink or both. Go with glass shelves. Now you’ve got some additional space to store toiletries. If you’d rather such things weren’t in plain sight, you can hang a small cupboard with drawers.
Source: Realtor.com
1080 Bassett Rd Unit D
Westlake, OH 44145 USA
Phone:
866.740.0005
Fax:
888.717.9751
Email:
support@ezsnapcovers.com
© 2024 EZ Snap Covers.
Powered by Shopify
Measure the height from the floor to the top of the metal wall plate.
Follow our guide for baseboard heater cover measurement:
Any baseboard larger than 7 3/8" (188 mm) will be compatible with our standard cover.
Any measurement greater than 9 3/8" (238 mm) will fit our tall cover.
Measure from the bottom of the finned tube heating element to the top of the metal wall plate,
A measurement of 5 1/2" to 6 3/4" (140 mm – 172 mm) will fit our standard cover.
A measurement of 7 1/2" to 8 3/4" (191 mm – 222 mm) will fit our tall cover.
Measure the distance from the wall or the metal wall plate attached to the wall, to the outside of the finned tube heating element.
Any measurement of less than 3 1/8" (76 mm) inches from the wall will fit our
standard cover.
Any measurement of less than 3 1/8" (76 mm) inches from the wall will fit our tall cover.
EZ Snap™ Wall Widgets are used when your old or existing wall back plate has been removed or if you have to hang your new cover 1 inch or higher to bring them up to a height that will fit our installation guidelines. Just measure your overall desired height, subtract 1", drill a hole, preferably in a stud and attach it to the wall with the included screw.
EZ Snap™ Floor Fidgets easily raise your new covers ¾ inch to compensate for any ¾ inch floor (wood, tile, or other) that has been installed any time since your baseboard heater was originally installed. May be used for any reason when the overall height has been shortened and the total height is less than 7-½ inches for standard height or 9-½ inches for the TALL height EZ Snap™ BaseBoard Covers. Just use the self-tapping screws to secure them to the top of your existing wallplate.
EZ Snap™ Wall Contraptions are used when your wall back plate has been completely removed. EZ Snap™ Wall Contraptions receives your EZ Snap™ BaseBoard Cover and keeps your aluminum fin tube from sagging. These completely replace your wall back plate. To install, slide up from the bottom and make sure the top is at your desired height. Screw to the wall, then bend the front finger up to hold the fin tube in place.
Measure from wall to wall and subtract ½ inch (to allow for wiggle room when installing your new covers.) The endcaps can be pulled or slid ½ inch outward on either end to fit your existing length requirements. Choose 2 flush to wall end caps.
Measure the overall length of the existing unit with ends attached then subtract ½ inch (to allow for wiggle room when installing your new covers.) The endcaps can be pulled or slid ½ inch outward on either end to fit your existing length requirements. Choose 2 Closed or Open-end caps.
Measure from the corner to the end of the unit with ends attached then subtract ½ inch (to allow for wiggle room when installing your new covers.) The endcaps can be pulled or slid ½ inch outward on either end to fit your existing length requirements. Choose 1 Closed or Open-end & 1 flush to wall end cap.
Measure the left side from corner A to corner B (see diagram). Then subtract 3 inches for the 90 degree inside corner, then subtract another ½ inch (to allow for wiggle room when installing your new covers.) Repeat for the right side if also wall to wall. You need to subtract a total of 3½ inches from each side that is wall to wall. Choose your end caps.
Measure the left side from the corner of the wall to the end of the unit with ends caps. Then subtract 3 inches for the 90 degree inside corner, then subtract another ½ inch (to allow for wiggle room when installing your new covers.) Repeat for the right side. You need to subtract a total of 3½ inches from both left and right sides. Choose your end caps.
L-Shaped outside radiators ending in the middle of the wall:
Measure from outside corner of the wall A to the end of the radiator unit with end caps attached B, then subtract ½" (to allow for wiggle room when installing your new covers.)
Measure from outside corner of the wall to the corner of the wall, then subtract 1/2" (to allow for wiggle room when installing your new covers.)
Left leg - measure from the corner out to the end of the radiator subtract 3" for the corner and ½ (to allow for wiggle room when installing your new covers.)
Center leg - measure from corner to corner and subtract 3" for each corner a total of 6"
Right leg - measure from the corner out to the end of the radiator subtract 3" for the corner and ½" (to allow for wiggle room when installing your new covers.).
We recommend that you order covers a little longer than normal and cut them on site, as there are many opportunities for mistakes in measuring and installation. By cutting on site you can fit and cut to fit. The covers can be cut with a good quality jigsaw and a fine metal cutting blade.
Now that you’ve learned how to measure baseboard heaters,
you’re ready to order.