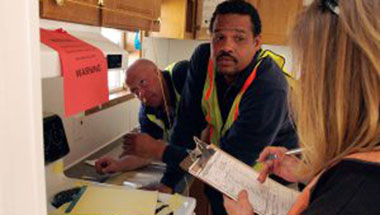
The Better Business Bureau (or BBB) is a network of agencies who collect information about businesses within different communities. The goal is to help customers find honest businesses and avoid scams or disreputable companies. They track complaints against businesses and also keep data about how quick businesses are to resolve such complaints.
Since the summer and fall are the busiest times of the year for home remodeling, many homeowners are turning their attentions to home improvement. Unfortunately, there is no shortage of amateur contractors who do poor work or who accept payment without completing projects. Your local BBB chapter wants you to be savvy when it comes to hiring contractors so they’ve offered a few tips.
Check with your local BBB
Of course the local BBB chapter will be a great place to start. As you research potential contractors in your community, do a quick check with the BBB to see what his/her rating is. If there’s a history of unresolved complaints against that contractor, move on.
Get several estimates
Even if your shortlist of contractors passes the BBB test, it’s a good idea to get multiple estimates so you can have something to compare them to. Don’t automatically go with the lowest bid (or the highest) but be wary of bids that are significantly higher or lower than the others for no apparent reason.
Ask for references
The ultimate test for any contractor is how satisfied his/her customers are with the work. Talk to family or friends in your area that have used the kind of contractor that you’re trying to hire and see what their experiences were. If possible, go look at their completed work in person and be on the lookout for signs of shoddy work. Remember that any references provided by the contractor are going to be their very best work.
Ask for license and proof of insurance
Under no circumstances should you hire a contractor who isn’t licensed and insured. The license of course shows that the contractor knows what he/she is doing and insurance protects you in case there is any accidental damage to your property during the work.
Get a contract in writing and read it carefully
You should get a contract in writing before any work begins. Don’t just shake hands or enter into a verbal agreement. Having it all in writing protects you and the contractor. Of course, you’ll then want to take the time to read over the contract carefully before signing to make sure everything is agreeable.
Don’t pay in full upfront
Many contractors will ask for some portion of the cost up front for ordering materials. Some won’t accept any payment until the work is completely to your satisfaction. Either is fine but don’t pay in full up front. Payments should be tied to completion of different stages of the project so that the contractor can’t skip town with your money.
Source: OAOnline
1080 Bassett Rd Unit D
Westlake, OH 44145 USA
Phone:
866.740.0005
Fax:
888.717.9751
Email:
support@ezsnapcovers.com
© 2024 EZ Snap Covers.
Powered by Shopify
Measure the height from the floor to the top of the metal wall plate.
Follow our guide for baseboard heater cover measurement:
Any baseboard larger than 7 3/8" (188 mm) will be compatible with our standard cover.
Any measurement greater than 9 3/8" (238 mm) will fit our tall cover.
Measure from the bottom of the finned tube heating element to the top of the metal wall plate,
A measurement of 5 1/2" to 6 3/4" (140 mm – 172 mm) will fit our standard cover.
A measurement of 7 1/2" to 8 3/4" (191 mm – 222 mm) will fit our tall cover.
Measure the distance from the wall or the metal wall plate attached to the wall, to the outside of the finned tube heating element.
Any measurement of less than 3 1/8" (76 mm) inches from the wall will fit our
standard cover.
Any measurement of less than 3 1/8" (76 mm) inches from the wall will fit our tall cover.
EZ Snap™ Wall Widgets are used when your old or existing wall back plate has been removed or if you have to hang your new cover 1 inch or higher to bring them up to a height that will fit our installation guidelines. Just measure your overall desired height, subtract 1", drill a hole, preferably in a stud and attach it to the wall with the included screw.
EZ Snap™ Floor Fidgets easily raise your new covers ¾ inch to compensate for any ¾ inch floor (wood, tile, or other) that has been installed any time since your baseboard heater was originally installed. May be used for any reason when the overall height has been shortened and the total height is less than 7-½ inches for standard height or 9-½ inches for the TALL height EZ Snap™ BaseBoard Covers. Just use the self-tapping screws to secure them to the top of your existing wallplate.
EZ Snap™ Wall Contraptions are used when your wall back plate has been completely removed. EZ Snap™ Wall Contraptions receives your EZ Snap™ BaseBoard Cover and keeps your aluminum fin tube from sagging. These completely replace your wall back plate. To install, slide up from the bottom and make sure the top is at your desired height. Screw to the wall, then bend the front finger up to hold the fin tube in place.
Measure from wall to wall and subtract ½ inch (to allow for wiggle room when installing your new covers.) The endcaps can be pulled or slid ½ inch outward on either end to fit your existing length requirements. Choose 2 flush to wall end caps.
Measure the overall length of the existing unit with ends attached then subtract ½ inch (to allow for wiggle room when installing your new covers.) The endcaps can be pulled or slid ½ inch outward on either end to fit your existing length requirements. Choose 2 Closed or Open-end caps.
Measure from the corner to the end of the unit with ends attached then subtract ½ inch (to allow for wiggle room when installing your new covers.) The endcaps can be pulled or slid ½ inch outward on either end to fit your existing length requirements. Choose 1 Closed or Open-end & 1 flush to wall end cap.
Measure the left side from corner A to corner B (see diagram). Then subtract 3 inches for the 90 degree inside corner, then subtract another ½ inch (to allow for wiggle room when installing your new covers.) Repeat for the right side if also wall to wall. You need to subtract a total of 3½ inches from each side that is wall to wall. Choose your end caps.
Measure the left side from the corner of the wall to the end of the unit with ends caps. Then subtract 3 inches for the 90 degree inside corner, then subtract another ½ inch (to allow for wiggle room when installing your new covers.) Repeat for the right side. You need to subtract a total of 3½ inches from both left and right sides. Choose your end caps.
L-Shaped outside radiators ending in the middle of the wall:
Measure from outside corner of the wall A to the end of the radiator unit with end caps attached B, then subtract ½" (to allow for wiggle room when installing your new covers.)
Measure from outside corner of the wall to the corner of the wall, then subtract 1/2" (to allow for wiggle room when installing your new covers.)
Left leg - measure from the corner out to the end of the radiator subtract 3" for the corner and ½ (to allow for wiggle room when installing your new covers.)
Center leg - measure from corner to corner and subtract 3" for each corner a total of 6"
Right leg - measure from the corner out to the end of the radiator subtract 3" for the corner and ½" (to allow for wiggle room when installing your new covers.).
We recommend that you order covers a little longer than normal and cut them on site, as there are many opportunities for mistakes in measuring and installation. By cutting on site you can fit and cut to fit. The covers can be cut with a good quality jigsaw and a fine metal cutting blade.
Now that you’ve learned how to measure baseboard heaters,
you’re ready to order.