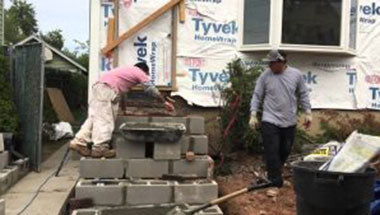
One of the most challenging aspects to remodeling your home is making sure that you’re in compliance with all local building codes. Every city has codes to ensure that homes are built and remodeled according to certain safety standards. Simple home improvement projects like installing baseboard radiator covers or a peel-and-stick backsplash in your kitchen obviously won’t require pulling any kind of permit, but many other projects will. In those cases, it’s probably best to hire a professional contractor who will take care of the permits. But if you really want to do the work yourself, then here is a list of common building code violations that DIYers commit. Making these mistakes can mean added costs and added time to your remodel.
Not pulling the necessary permits
This is one of the simpler ones to avoid yet thousands of homeowners make this mistake every year. Many homeowners mistakenly assume that just because they’re doing the work themselves, they don’t need to get a permit from the city. They do. Unless you’re absolutely certain that the kind of work you’re doing doesn’t require a permit, you should familiarize yourself with the local building codes so you know which projects require a permit.
If you’re doing work on the exterior of your home, there’s a good chance you’ll be required to get a zoning permit. This is different from a building permit and they vary from state to state, county to county, and even city to city.
Improper electrical work
Because of the dangerous nature of electrical work, no homeowner should ever attempt this kind of work without bringing in a licensed electrician. Even though no one will know initially, you will have trouble selling your home if an inspection turns up faulty electrical work. That’s a best case scenario. Worst case you could burn down your home or seriously injure or kill yourself. Some of the most common electrical work mistakes homeowners make are using the wrong sized circuit, splicing wires without a junction box, or missing a ground-fault circuit interrupter. If that sounds like a foreign language to you, then hire a licensed electrician.
Venting a bathroom to the attic
In all likelihood, your local building codes require that your bathroom fan is vented directly to the outdoors and not into your attic space. While other rooms can be vented to the attic, and from there, to the outside, bathroom fan ventilation must bypass the attic. That’s because a lot of moisture is going to come through that particular fan and if it ends up in the attic, you’re going to have problems with mold and rot.
Other issues
There are many other common building code violations most having to do with safety concerns. For example, not testing for asbestos in older homes, decks not properly fastened to the home, and basement bedrooms without a window exit.
Again, your safest option is to hire a contractor to oversee the remodel and make sure everything is in accordance with local building codes. If not though, make sure you do your research, pull the necessary permits, and do everything according to code.
Source: Lansing State Journal
1080 Bassett Rd Unit D
Westlake, OH 44145 USA
Phone:
866.740.0005
Fax:
888.717.9751
Email:
support@ezsnapcovers.com
© 2025 EZ Snap Covers.
Powered by Shopify
Measure the height from the floor to the top of the metal wall plate.
Follow our guide for baseboard heater cover measurement:
Any baseboard larger than 7 3/8" (188 mm) will be compatible with our standard cover.
Any measurement greater than 9 3/8" (238 mm) will fit our tall cover.
Measure from the bottom of the finned tube heating element to the top of the metal wall plate,
A measurement of 5 1/2" to 6 3/4" (140 mm – 172 mm) will fit our standard cover.
A measurement of 7 1/2" to 8 3/4" (191 mm – 222 mm) will fit our tall cover.
Measure the distance from the wall or the metal wall plate attached to the wall, to the outside of the finned tube heating element.
Any measurement of less than 3 1/8" (76 mm) inches from the wall will fit our
standard cover.
Any measurement of less than 3 1/8" (76 mm) inches from the wall will fit our tall cover.
EZ Snap™ Wall Widgets are used when your old or existing wall back plate has been removed or if you have to hang your new cover 1 inch or higher to bring them up to a height that will fit our installation guidelines. Just measure your overall desired height, subtract 1", drill a hole, preferably in a stud and attach it to the wall with the included screw.
EZ Snap™ Floor Fidgets easily raise your new covers ¾ inch to compensate for any ¾ inch floor (wood, tile, or other) that has been installed any time since your baseboard heater was originally installed. May be used for any reason when the overall height has been shortened and the total height is less than 7-½ inches for standard height or 9-½ inches for the TALL height EZ Snap™ BaseBoard Covers. Just use the self-tapping screws to secure them to the top of your existing wallplate.
EZ Snap™ Wall Contraptions are used when your wall back plate has been completely removed. EZ Snap™ Wall Contraptions receives your EZ Snap™ BaseBoard Cover and keeps your aluminum fin tube from sagging. These completely replace your wall back plate. To install, slide up from the bottom and make sure the top is at your desired height. Screw to the wall, then bend the front finger up to hold the fin tube in place.
Measure from wall to wall and subtract ½ inch (to allow for wiggle room when installing your new covers.) The endcaps can be pulled or slid ½ inch outward on either end to fit your existing length requirements. Choose 2 flush to wall end caps.
Measure the overall length of the existing unit with ends attached then subtract ½ inch (to allow for wiggle room when installing your new covers.) The endcaps can be pulled or slid ½ inch outward on either end to fit your existing length requirements. Choose 2 Closed or Open-end caps.
Measure from the corner to the end of the unit with ends attached then subtract ½ inch (to allow for wiggle room when installing your new covers.) The endcaps can be pulled or slid ½ inch outward on either end to fit your existing length requirements. Choose 1 Closed or Open-end & 1 flush to wall end cap.
Measure the left side from corner A to corner B (see diagram). Then subtract 3 inches for the 90 degree inside corner, then subtract another ½ inch (to allow for wiggle room when installing your new covers.) Repeat for the right side if also wall to wall. You need to subtract a total of 3½ inches from each side that is wall to wall. Choose your end caps.
Measure the left side from the corner of the wall to the end of the unit with ends caps. Then subtract 3 inches for the 90 degree inside corner, then subtract another ½ inch (to allow for wiggle room when installing your new covers.) Repeat for the right side. You need to subtract a total of 3½ inches from both left and right sides. Choose your end caps.
L-Shaped outside radiators ending in the middle of the wall:
Measure from outside corner of the wall A to the end of the radiator unit with end caps attached B, then subtract ½" (to allow for wiggle room when installing your new covers.)
Measure from outside corner of the wall to the corner of the wall, then subtract 1/2" (to allow for wiggle room when installing your new covers.)
Left leg - measure from the corner out to the end of the radiator subtract 3" for the corner and ½ (to allow for wiggle room when installing your new covers.)
Center leg - measure from corner to corner and subtract 3" for each corner a total of 6"
Right leg - measure from the corner out to the end of the radiator subtract 3" for the corner and ½" (to allow for wiggle room when installing your new covers.).
We recommend that you order covers a little longer than normal and cut them on site, as there are many opportunities for mistakes in measuring and installation. By cutting on site you can fit and cut to fit. The covers can be cut with a good quality jigsaw and a fine metal cutting blade.
Now that you’ve learned how to measure baseboard heaters,
you’re ready to order.