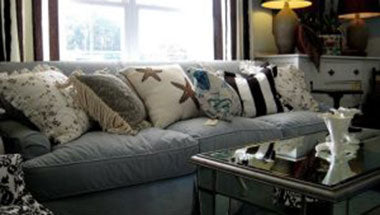
Having a beautifully decorated home comes naturally to some, while others struggle to even buy decorations let alone have it all add up to a truly beautiful room. It seems like they must have spent thousands decorating their home given how nice it looks, but the truth is a place can make you look rich while still being decorated on a budget. Here are five tips, thanks to Business Insider, for making your space feel like it cost a lot of money even if you were on a tight budget.
Timeless main pieces
The first thing to do is to ensure your main pieces that you invest in can work with a variety of themes and will grow with your tastes rather than be stuck in a particular era. Your couches, tables, and large expensive pieces aren’t ones you are going to want to change very often, so make sure to get something you really like that is comfortable and will look good in any space.
Pick one expensive piece
If there is something you absolutely love, even though it is a little pricey, just get it. You want to be able to mix and match expensive things with thrift store finds in order to get the best overall look. Maybe it is a lamp you adore or a side table or even a very nice couch. Maybe it’s just a giant dog statue from Joey’s place. Whatever it is, get something that you love even if you have to splurge a little. It will make the room feel more expensive and more like you.
Paint, paint, paint
Nothing livens up a space more than a good paint job. Maybe your old paint is starting to fade or there’s just way too many holes and dirt piled on from over the years. Whatever the case, paint starts to look pretty gross after too long, and a quick paint job can make the place look new again. You can make the place look glamorous or extra dramatic with dramatic paint colors or even just one wall with a splash of color. Whatever your preference, freshening up the place will make it look more rich.
It is also a very good way to cover up the ugly. Got wood paneling? Paint it white and it might make for a cool textured wall. Got baseboard heaters? Cover it with baseboard heater covers painted in white to make it blend in with the baseboards. Whatever it is, paint can go a long way to get rid of the ugly.
Textured materials
Adding texture into your design gives it extra depth making it feel more luxurious and expensive. Don’t stick with the same type of materail on your couch, pillows, and tables. Get something a little rougher or smoother to even it out.
Too much matching
Your grandma might say otherwise, but matching isn’t always the way to go. Always matching colors and themes might make it feel a bit too put together and less welcoming. If you want your home to still feel like a home even if it is looking rich and luxurious, add in a few things that don’t match. They make great accent pieces and really only add to the wealth.
1080 Bassett Rd Unit D
Westlake, OH 44145 USA
Phone:
866.740.0005
Fax:
888.717.9751
Email:
support@ezsnapcovers.com
© 2024 EZ Snap Covers.
Powered by Shopify
Measure the height from the floor to the top of the metal wall plate.
Follow our guide for baseboard heater cover measurement:
Any baseboard larger than 7 3/8" (188 mm) will be compatible with our standard cover.
Any measurement greater than 9 3/8" (238 mm) will fit our tall cover.
Measure from the bottom of the finned tube heating element to the top of the metal wall plate,
A measurement of 5 1/2" to 6 3/4" (140 mm – 172 mm) will fit our standard cover.
A measurement of 7 1/2" to 8 3/4" (191 mm – 222 mm) will fit our tall cover.
Measure the distance from the wall or the metal wall plate attached to the wall, to the outside of the finned tube heating element.
Any measurement of less than 3 1/8" (76 mm) inches from the wall will fit our
standard cover.
Any measurement of less than 3 1/8" (76 mm) inches from the wall will fit our tall cover.
EZ Snap™ Wall Widgets are used when your old or existing wall back plate has been removed or if you have to hang your new cover 1 inch or higher to bring them up to a height that will fit our installation guidelines. Just measure your overall desired height, subtract 1", drill a hole, preferably in a stud and attach it to the wall with the included screw.
EZ Snap™ Floor Fidgets easily raise your new covers ¾ inch to compensate for any ¾ inch floor (wood, tile, or other) that has been installed any time since your baseboard heater was originally installed. May be used for any reason when the overall height has been shortened and the total height is less than 7-½ inches for standard height or 9-½ inches for the TALL height EZ Snap™ BaseBoard Covers. Just use the self-tapping screws to secure them to the top of your existing wallplate.
EZ Snap™ Wall Contraptions are used when your wall back plate has been completely removed. EZ Snap™ Wall Contraptions receives your EZ Snap™ BaseBoard Cover and keeps your aluminum fin tube from sagging. These completely replace your wall back plate. To install, slide up from the bottom and make sure the top is at your desired height. Screw to the wall, then bend the front finger up to hold the fin tube in place.
Measure from wall to wall and subtract ½ inch (to allow for wiggle room when installing your new covers.) The endcaps can be pulled or slid ½ inch outward on either end to fit your existing length requirements. Choose 2 flush to wall end caps.
Measure the overall length of the existing unit with ends attached then subtract ½ inch (to allow for wiggle room when installing your new covers.) The endcaps can be pulled or slid ½ inch outward on either end to fit your existing length requirements. Choose 2 Closed or Open-end caps.
Measure from the corner to the end of the unit with ends attached then subtract ½ inch (to allow for wiggle room when installing your new covers.) The endcaps can be pulled or slid ½ inch outward on either end to fit your existing length requirements. Choose 1 Closed or Open-end & 1 flush to wall end cap.
Measure the left side from corner A to corner B (see diagram). Then subtract 3 inches for the 90 degree inside corner, then subtract another ½ inch (to allow for wiggle room when installing your new covers.) Repeat for the right side if also wall to wall. You need to subtract a total of 3½ inches from each side that is wall to wall. Choose your end caps.
Measure the left side from the corner of the wall to the end of the unit with ends caps. Then subtract 3 inches for the 90 degree inside corner, then subtract another ½ inch (to allow for wiggle room when installing your new covers.) Repeat for the right side. You need to subtract a total of 3½ inches from both left and right sides. Choose your end caps.
L-Shaped outside radiators ending in the middle of the wall:
Measure from outside corner of the wall A to the end of the radiator unit with end caps attached B, then subtract ½" (to allow for wiggle room when installing your new covers.)
Measure from outside corner of the wall to the corner of the wall, then subtract 1/2" (to allow for wiggle room when installing your new covers.)
Left leg - measure from the corner out to the end of the radiator subtract 3" for the corner and ½ (to allow for wiggle room when installing your new covers.)
Center leg - measure from corner to corner and subtract 3" for each corner a total of 6"
Right leg - measure from the corner out to the end of the radiator subtract 3" for the corner and ½" (to allow for wiggle room when installing your new covers.).
We recommend that you order covers a little longer than normal and cut them on site, as there are many opportunities for mistakes in measuring and installation. By cutting on site you can fit and cut to fit. The covers can be cut with a good quality jigsaw and a fine metal cutting blade.
Now that you’ve learned how to measure baseboard heaters,
you’re ready to order.