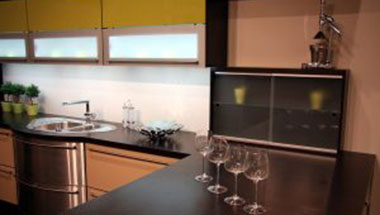
You probably spend time in your kitchen every day, so decorating in there is very important. But in a room that gets messy so easily, it is important that your decorations don’t make the space feel cluttered. Instead of having a nice, clean, relaxing kitchen, you could end up feeling like you are sitting in chaos every time you use your kitchen. Here are some tips for decorating in your kitchen without feeling cluttered.
Keep things hidden away
If you have plenty of space in your cupboards, keep everything in them. For glass cabinets that you can see into, make sure you put your rarely-used China that looks pretty but doesn’t necessarily get used often. It will keep that space neat regardless of how neat everything else is. Don’t keep anything on the counter unless it is something you use every day like a toaster or a small, permanent decoration.
This includes making sure you don’t keep any food on your counter. A bread box or fruit bowl isn’t a big deal, but don’t leave cereal boxes or snacks on the counter where you can see them.
Get rid of things you don’t use
A lot of people don’t have room in their cupboards to hide everything away. This is a sure sign it is time to donate some of the things you don’t use often. If you don’t use it at least once a year, then it is time to get rid of it. If you own a bread maker but never make bread, it isn’t worth storing. This is a good rule of thumb for anything you might be storing around your house.
I always tell people to keep one box with memorabilia per person in your home, and the rest can be thrown away. Chances are, you won’t go through it if it is more than one box, and your kids won’t want to take more than one box of childhood memorabilia when they leave home anyway.
Decorate with your dishes and utensils
Another way to make some extra space while feeling less cluttered is to use your dishes and utensils in your decorating. For example, you could get a board with some hooks on it to hold your coffee mugs on the wall. It is a kitchen-themed decoration and can hold something you use on a regular basis.
Organize your space
Even with the most beautiful paint job, baseboard heater covers, and cabinets, your space will always feel cluttered if it isn’t organized. Do what you can to organize your space, so you don’t have to stress about it. You can get bins to organize different types of food in your fridge or pantry. Some people even organize in their pantry based on days of the week and the meals they have planned for those days. If you know where everything is, it will feel more organized, even if it isn’t.
1080 Bassett Rd Unit D
Westlake, OH 44145 USA
Phone:
866.740.0005
Fax:
888.717.9751
Email:
support@ezsnapcovers.com
© 2024 EZ Snap Covers.
Powered by Shopify
Measure the height from the floor to the top of the metal wall plate.
Follow our guide for baseboard heater cover measurement:
Any baseboard larger than 7 3/8" (188 mm) will be compatible with our standard cover.
Any measurement greater than 9 3/8" (238 mm) will fit our tall cover.
Measure from the bottom of the finned tube heating element to the top of the metal wall plate,
A measurement of 5 1/2" to 6 3/4" (140 mm – 172 mm) will fit our standard cover.
A measurement of 7 1/2" to 8 3/4" (191 mm – 222 mm) will fit our tall cover.
Measure the distance from the wall or the metal wall plate attached to the wall, to the outside of the finned tube heating element.
Any measurement of less than 3 1/8" (76 mm) inches from the wall will fit our
standard cover.
Any measurement of less than 3 1/8" (76 mm) inches from the wall will fit our tall cover.
EZ Snap™ Wall Widgets are used when your old or existing wall back plate has been removed or if you have to hang your new cover 1 inch or higher to bring them up to a height that will fit our installation guidelines. Just measure your overall desired height, subtract 1", drill a hole, preferably in a stud and attach it to the wall with the included screw.
EZ Snap™ Floor Fidgets easily raise your new covers ¾ inch to compensate for any ¾ inch floor (wood, tile, or other) that has been installed any time since your baseboard heater was originally installed. May be used for any reason when the overall height has been shortened and the total height is less than 7-½ inches for standard height or 9-½ inches for the TALL height EZ Snap™ BaseBoard Covers. Just use the self-tapping screws to secure them to the top of your existing wallplate.
EZ Snap™ Wall Contraptions are used when your wall back plate has been completely removed. EZ Snap™ Wall Contraptions receives your EZ Snap™ BaseBoard Cover and keeps your aluminum fin tube from sagging. These completely replace your wall back plate. To install, slide up from the bottom and make sure the top is at your desired height. Screw to the wall, then bend the front finger up to hold the fin tube in place.
Measure from wall to wall and subtract ½ inch (to allow for wiggle room when installing your new covers.) The endcaps can be pulled or slid ½ inch outward on either end to fit your existing length requirements. Choose 2 flush to wall end caps.
Measure the overall length of the existing unit with ends attached then subtract ½ inch (to allow for wiggle room when installing your new covers.) The endcaps can be pulled or slid ½ inch outward on either end to fit your existing length requirements. Choose 2 Closed or Open-end caps.
Measure from the corner to the end of the unit with ends attached then subtract ½ inch (to allow for wiggle room when installing your new covers.) The endcaps can be pulled or slid ½ inch outward on either end to fit your existing length requirements. Choose 1 Closed or Open-end & 1 flush to wall end cap.
Measure the left side from corner A to corner B (see diagram). Then subtract 3 inches for the 90 degree inside corner, then subtract another ½ inch (to allow for wiggle room when installing your new covers.) Repeat for the right side if also wall to wall. You need to subtract a total of 3½ inches from each side that is wall to wall. Choose your end caps.
Measure the left side from the corner of the wall to the end of the unit with ends caps. Then subtract 3 inches for the 90 degree inside corner, then subtract another ½ inch (to allow for wiggle room when installing your new covers.) Repeat for the right side. You need to subtract a total of 3½ inches from both left and right sides. Choose your end caps.
L-Shaped outside radiators ending in the middle of the wall:
Measure from outside corner of the wall A to the end of the radiator unit with end caps attached B, then subtract ½" (to allow for wiggle room when installing your new covers.)
Measure from outside corner of the wall to the corner of the wall, then subtract 1/2" (to allow for wiggle room when installing your new covers.)
Left leg - measure from the corner out to the end of the radiator subtract 3" for the corner and ½ (to allow for wiggle room when installing your new covers.)
Center leg - measure from corner to corner and subtract 3" for each corner a total of 6"
Right leg - measure from the corner out to the end of the radiator subtract 3" for the corner and ½" (to allow for wiggle room when installing your new covers.).
We recommend that you order covers a little longer than normal and cut them on site, as there are many opportunities for mistakes in measuring and installation. By cutting on site you can fit and cut to fit. The covers can be cut with a good quality jigsaw and a fine metal cutting blade.
Now that you’ve learned how to measure baseboard heaters,
you’re ready to order.