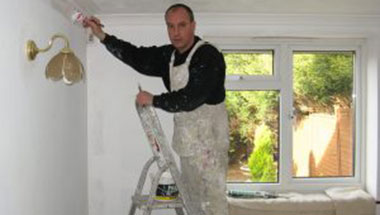
Interior decorating is a task fraught with peril. There are pitfalls everywhere for the first-time interior designer. Here are eleven of the most common interior design mistakes and how to avoid them.
Buying everything in one day
Decorating a new home is very exciting. It’s understandable that you’re in a rush to do it because it’s a job you actually look forward to doing. However, there is a downside to purchasing everything you need to decorate a room in a single day. You don’t want a room in which everything matches. Avoid buying everything from a single collection or even a single store. Decorating should be a layered process that takes time. Be patient and collect items over time.
Buying furniture without measuring
You might be surprised how many first-time homeowners run out to the furniture to buy sofas, beds, and other furnishings without measuring first. Before you go out to buy furniture for a room, get the measurements for that room and bring along a tape measure to the furniture store. They’ll probably have tape measures there as well but it doesn’t hurt to come prepared.
Picking pale paint
Larger spaces need more tonal depth. When selecting the main color for your home, especially in an open floor plan, select a paint color that’s a little darker than you’d normally go with because most homeowners tend to pick something that is too pale.
Area rugs that are too small
For whatever reason, homeowners assume that area rugs need to be smaller than the really do. A rug should extend to within 12-16 inches of the walls in a room. Anything smaller will seem insignificant and you may as well save your money. The front legs of your furniture should sit on the area rug so it isn’t "floating" in the middle of the room.
Opting for no headboard
A headboard is usually the focal point of the bedroom, but so many homeowners choose to go without it. If you really don’t want a headboard, paint the wall behind the bed a more dramatic color or hang some eye-catching artwork.
Decorating without help
Decorating is expensive, difficult, and emotionally draining (even though it starts out fun) so hire a professional to help or at least involve a friend or family member for moral support (and free labor).
Too many accessories
It’s better to save your money and spend a little more on nicer furniture that will last years than to spend it on cheap little accessories that are in fashion for a year or two and then dated.
Hanging frames too high
People have a tendency to hang frames higher than they should. You should be hanging frames so that the bottom of the frame is 8-10 inches above the top of whatever furniture is there. In a hallway where there is no furniture, hang frames so that the middle of the art or photograph is 66 inches from the floor.
A front door that blends in
You want the garage door to blend in and the front door to stand out. So have the garage door be a color that’s similar to the rest of the home’s exterior and choose a complementary color that really pops for the front door. You want your front door to be the first thing people notice about your home.
Too many collectibles
Almost everyone has a hobby or things they like to collect and it’s perfectly natural to want to display them. But exercise some restrain and limit such displays to a single area in your home. Group a collection together on a shelf, desk, or table. If you have more pieces than you can display, then you can have some fun rotating new pieces from time to time.
Having more than one focal point
Every space needs a single focal point to draw people’s attention. For a living room that’s usually a fireplace or a television. For a bedroom, it’s usually a headboard. For the bathroom, it’s the vanity. Just make sure that the focal point is obvious.
Interior Decorating and Remodeling News Brought to You by EZSnapCovers.com
Source: BT.com
1080 Bassett Rd Unit D
Westlake, OH 44145 USA
Phone:
866.740.0005
Fax:
888.717.9751
Email:
support@ezsnapcovers.com
© 2024 EZ Snap Covers.
Powered by Shopify
Measure the height from the floor to the top of the metal wall plate.
Follow our guide for baseboard heater cover measurement:
Any baseboard larger than 7 3/8" (188 mm) will be compatible with our standard cover.
Any measurement greater than 9 3/8" (238 mm) will fit our tall cover.
Measure from the bottom of the finned tube heating element to the top of the metal wall plate,
A measurement of 5 1/2" to 6 3/4" (140 mm – 172 mm) will fit our standard cover.
A measurement of 7 1/2" to 8 3/4" (191 mm – 222 mm) will fit our tall cover.
Measure the distance from the wall or the metal wall plate attached to the wall, to the outside of the finned tube heating element.
Any measurement of less than 3 1/8" (76 mm) inches from the wall will fit our
standard cover.
Any measurement of less than 3 1/8" (76 mm) inches from the wall will fit our tall cover.
EZ Snap™ Wall Widgets are used when your old or existing wall back plate has been removed or if you have to hang your new cover 1 inch or higher to bring them up to a height that will fit our installation guidelines. Just measure your overall desired height, subtract 1", drill a hole, preferably in a stud and attach it to the wall with the included screw.
EZ Snap™ Floor Fidgets easily raise your new covers ¾ inch to compensate for any ¾ inch floor (wood, tile, or other) that has been installed any time since your baseboard heater was originally installed. May be used for any reason when the overall height has been shortened and the total height is less than 7-½ inches for standard height or 9-½ inches for the TALL height EZ Snap™ BaseBoard Covers. Just use the self-tapping screws to secure them to the top of your existing wallplate.
EZ Snap™ Wall Contraptions are used when your wall back plate has been completely removed. EZ Snap™ Wall Contraptions receives your EZ Snap™ BaseBoard Cover and keeps your aluminum fin tube from sagging. These completely replace your wall back plate. To install, slide up from the bottom and make sure the top is at your desired height. Screw to the wall, then bend the front finger up to hold the fin tube in place.
Measure from wall to wall and subtract ½ inch (to allow for wiggle room when installing your new covers.) The endcaps can be pulled or slid ½ inch outward on either end to fit your existing length requirements. Choose 2 flush to wall end caps.
Measure the overall length of the existing unit with ends attached then subtract ½ inch (to allow for wiggle room when installing your new covers.) The endcaps can be pulled or slid ½ inch outward on either end to fit your existing length requirements. Choose 2 Closed or Open-end caps.
Measure from the corner to the end of the unit with ends attached then subtract ½ inch (to allow for wiggle room when installing your new covers.) The endcaps can be pulled or slid ½ inch outward on either end to fit your existing length requirements. Choose 1 Closed or Open-end & 1 flush to wall end cap.
Measure the left side from corner A to corner B (see diagram). Then subtract 3 inches for the 90 degree inside corner, then subtract another ½ inch (to allow for wiggle room when installing your new covers.) Repeat for the right side if also wall to wall. You need to subtract a total of 3½ inches from each side that is wall to wall. Choose your end caps.
Measure the left side from the corner of the wall to the end of the unit with ends caps. Then subtract 3 inches for the 90 degree inside corner, then subtract another ½ inch (to allow for wiggle room when installing your new covers.) Repeat for the right side. You need to subtract a total of 3½ inches from both left and right sides. Choose your end caps.
L-Shaped outside radiators ending in the middle of the wall:
Measure from outside corner of the wall A to the end of the radiator unit with end caps attached B, then subtract ½" (to allow for wiggle room when installing your new covers.)
Measure from outside corner of the wall to the corner of the wall, then subtract 1/2" (to allow for wiggle room when installing your new covers.)
Left leg - measure from the corner out to the end of the radiator subtract 3" for the corner and ½ (to allow for wiggle room when installing your new covers.)
Center leg - measure from corner to corner and subtract 3" for each corner a total of 6"
Right leg - measure from the corner out to the end of the radiator subtract 3" for the corner and ½" (to allow for wiggle room when installing your new covers.).
We recommend that you order covers a little longer than normal and cut them on site, as there are many opportunities for mistakes in measuring and installation. By cutting on site you can fit and cut to fit. The covers can be cut with a good quality jigsaw and a fine metal cutting blade.
Now that you’ve learned how to measure baseboard heaters,
you’re ready to order.