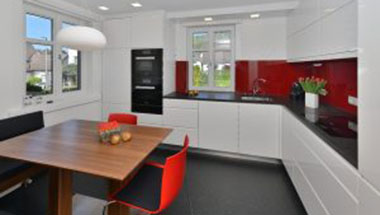
Interior design trends come and go. If you’re too anxious to go with the latest and greatest trend, you’ll end up with a home that looks dated just a few years down the road. But some trends are meant to last for decades. How can you tell the difference? Just take our word for it. Here are five home design trends that won’t go out of style any time soon.
Automation and integration
This is a trend you’re probably noticing everywhere, not just with home design. Our smartphones sync automatically when we get behind the wheel and plays our favorite music. It also allows us to make and take hands-free phone calls while we drive. You can scan an energy bar’s wrapper into your fitness app to find out how many calories it has. You can watch shows you’ve recorded on your DVR on your phone or tablet wherever you are. So it’s not surprising that automation and integration trends are spilling over into home design.
There are now ovens that you can control with your smartphone and electrical outlets that include USB ports to charge your mobile devices. You can now automate everything from home security, to temperature, lighting, and shade.
Healthy living
We’ve known about germs and how easily they can spread since the 1800s but we’re only just now starting to see hands-free faucets and toilets that flush automatically. These have been around for a while in many businesses but they’re starting to become more popular for residential use. Though these could be categorized under the automation trend, this seems to be part of a larger movement to make our lives healthier.
Sustainability
Americans are more conscious of their impact on the environment than ever before. So it’s not surprising that many homeowners are making changes to their homes to make them more sustainable. Solar roofing, energy-efficient windows, doors, lightbulbs, and appliances, and water-saving toilets are all examples of the ways homeowners are doing their part to conserve energy and natural resources.
User-focused design
In today’s mobile technology-driven world, we want everything to be personalized and user friendly, and that extends to home design as well. Control pads in the home, whether on appliances or in the shower, are customizable and programmable. Many of them you can control from a smartphone or tablet. As the baby boomer generation ages, accessibility features like handrails, wider walkways, and walk-in showers that make it easier to age in place are going to become the standard. User-focused design is all about comfort and convenience and isn’t very concerned about resale value.
Clean and contemporary
Today’s homeowner’s like things that look sleek and contemporary. They also value things that are easy to keep clean such as stainless steel for appliances and simple cabinet fronts without elaborate molding where spills can get stuck on.
Source: San Diego Union-Tribune
1080 Bassett Rd Unit D
Westlake, OH 44145 USA
Phone:
866.740.0005
Fax:
888.717.9751
Email:
support@ezsnapcovers.com
© 2024 EZ Snap Covers.
Powered by Shopify
Measure the height from the floor to the top of the metal wall plate.
Follow our guide for baseboard heater cover measurement:
Any baseboard larger than 7 3/8" (188 mm) will be compatible with our standard cover.
Any measurement greater than 9 3/8" (238 mm) will fit our tall cover.
Measure from the bottom of the finned tube heating element to the top of the metal wall plate,
A measurement of 5 1/2" to 6 3/4" (140 mm – 172 mm) will fit our standard cover.
A measurement of 7 1/2" to 8 3/4" (191 mm – 222 mm) will fit our tall cover.
Measure the distance from the wall or the metal wall plate attached to the wall, to the outside of the finned tube heating element.
Any measurement of less than 3 1/8" (76 mm) inches from the wall will fit our
standard cover.
Any measurement of less than 3 1/8" (76 mm) inches from the wall will fit our tall cover.
EZ Snap™ Wall Widgets are used when your old or existing wall back plate has been removed or if you have to hang your new cover 1 inch or higher to bring them up to a height that will fit our installation guidelines. Just measure your overall desired height, subtract 1", drill a hole, preferably in a stud and attach it to the wall with the included screw.
EZ Snap™ Floor Fidgets easily raise your new covers ¾ inch to compensate for any ¾ inch floor (wood, tile, or other) that has been installed any time since your baseboard heater was originally installed. May be used for any reason when the overall height has been shortened and the total height is less than 7-½ inches for standard height or 9-½ inches for the TALL height EZ Snap™ BaseBoard Covers. Just use the self-tapping screws to secure them to the top of your existing wallplate.
EZ Snap™ Wall Contraptions are used when your wall back plate has been completely removed. EZ Snap™ Wall Contraptions receives your EZ Snap™ BaseBoard Cover and keeps your aluminum fin tube from sagging. These completely replace your wall back plate. To install, slide up from the bottom and make sure the top is at your desired height. Screw to the wall, then bend the front finger up to hold the fin tube in place.
Measure from wall to wall and subtract ½ inch (to allow for wiggle room when installing your new covers.) The endcaps can be pulled or slid ½ inch outward on either end to fit your existing length requirements. Choose 2 flush to wall end caps.
Measure the overall length of the existing unit with ends attached then subtract ½ inch (to allow for wiggle room when installing your new covers.) The endcaps can be pulled or slid ½ inch outward on either end to fit your existing length requirements. Choose 2 Closed or Open-end caps.
Measure from the corner to the end of the unit with ends attached then subtract ½ inch (to allow for wiggle room when installing your new covers.) The endcaps can be pulled or slid ½ inch outward on either end to fit your existing length requirements. Choose 1 Closed or Open-end & 1 flush to wall end cap.
Measure the left side from corner A to corner B (see diagram). Then subtract 3 inches for the 90 degree inside corner, then subtract another ½ inch (to allow for wiggle room when installing your new covers.) Repeat for the right side if also wall to wall. You need to subtract a total of 3½ inches from each side that is wall to wall. Choose your end caps.
Measure the left side from the corner of the wall to the end of the unit with ends caps. Then subtract 3 inches for the 90 degree inside corner, then subtract another ½ inch (to allow for wiggle room when installing your new covers.) Repeat for the right side. You need to subtract a total of 3½ inches from both left and right sides. Choose your end caps.
L-Shaped outside radiators ending in the middle of the wall:
Measure from outside corner of the wall A to the end of the radiator unit with end caps attached B, then subtract ½" (to allow for wiggle room when installing your new covers.)
Measure from outside corner of the wall to the corner of the wall, then subtract 1/2" (to allow for wiggle room when installing your new covers.)
Left leg - measure from the corner out to the end of the radiator subtract 3" for the corner and ½ (to allow for wiggle room when installing your new covers.)
Center leg - measure from corner to corner and subtract 3" for each corner a total of 6"
Right leg - measure from the corner out to the end of the radiator subtract 3" for the corner and ½" (to allow for wiggle room when installing your new covers.).
We recommend that you order covers a little longer than normal and cut them on site, as there are many opportunities for mistakes in measuring and installation. By cutting on site you can fit and cut to fit. The covers can be cut with a good quality jigsaw and a fine metal cutting blade.
Now that you’ve learned how to measure baseboard heaters,
you’re ready to order.