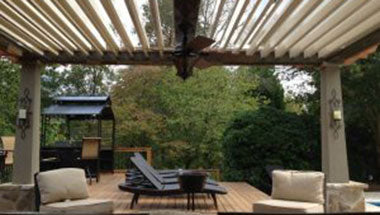
Now that the weather is warming up, you may be longing to spend a little more time outdoors. But it can be difficult if you don’t have a great outdoor living space. If all you have is a chair or two on your porch and you’d like to improve your outdoor living space, here are five tips.
Blur the boundaries
Most homeowners tend to draw a distinct line between the home’s interior and the home’s exterior. That’s a mistake. Instead, think of an outdoor living space as an extension of your home’s interior. Don’t use cheap, plastic furniture that you’re accustomed to seeing outdoors. The quality of outdoor fabrics has improved a lot in recent years which means you can often get the look of indoor furniture with the durability that outdoor furniture needs. If the nights get cool in your climate, consider a fire pit so that guests can enjoy more time outdoors even when the sun has gone down.
Go low maintenance
Wood furniture requires a lot of maintenance and gets damaged easily, especially in wetter climates. Go with metal or plastic-coated metal pieces if you don’t want to worry about needing to pull everything inside when it rains.
Be bold
Don’t be afraid to go with something a little out of the ordinary. Go with bright colors, tropical prints, or unusual styles to give your outdoor living space a unique look that really stands out from you typical outdoor furniture. Another option is to repaint existing furniture in a bright color to get a new look without spending much.
Light and shade
Be mindful about lighting and shade and think about which direction the sun will be shining down from at different times of the idea when the space is most likely to be used. You may want to have an awning built to provide shade for daytime use. Outdoor lighting is a must if you want to use the space at night. There are dozens of options when it comes to outdoor lighting. Solar powered outdoor lighting can allow you to use the space well into the night without spending a fortune on your electricity bill.
Outdoor kitchen
The holy grail of outdoor living spaces is a full outdoor kitchen. It isn’t a good investment for everybody but if you live in a warmer climate and can get a lot out use out of it, installing an outdoor kitchen can be worth the investment. When you entertain your guests you can have everything you need outside so there’s no need to make frequent trips in and out of the house to serve food or drinks.
Interior Decorating and Remodeling News Brought to You by EZSnapCovers.com
Source: telegraph.co.uk/interiors/home/take-it-outside-five-steps-to-a-stylish-garden-room/
1080 Bassett Rd Unit D
Westlake, OH 44145 USA
Phone:
866.740.0005
Fax:
888.717.9751
Email:
support@ezsnapcovers.com
© 2024 EZ Snap Covers.
Powered by Shopify
Measure the height from the floor to the top of the metal wall plate.
Follow our guide for baseboard heater cover measurement:
Any baseboard larger than 7 3/8" (188 mm) will be compatible with our standard cover.
Any measurement greater than 9 3/8" (238 mm) will fit our tall cover.
Measure from the bottom of the finned tube heating element to the top of the metal wall plate,
A measurement of 5 1/2" to 6 3/4" (140 mm – 172 mm) will fit our standard cover.
A measurement of 7 1/2" to 8 3/4" (191 mm – 222 mm) will fit our tall cover.
Measure the distance from the wall or the metal wall plate attached to the wall, to the outside of the finned tube heating element.
Any measurement of less than 3 1/8" (76 mm) inches from the wall will fit our
standard cover.
Any measurement of less than 3 1/8" (76 mm) inches from the wall will fit our tall cover.
EZ Snap™ Wall Widgets are used when your old or existing wall back plate has been removed or if you have to hang your new cover 1 inch or higher to bring them up to a height that will fit our installation guidelines. Just measure your overall desired height, subtract 1", drill a hole, preferably in a stud and attach it to the wall with the included screw.
EZ Snap™ Floor Fidgets easily raise your new covers ¾ inch to compensate for any ¾ inch floor (wood, tile, or other) that has been installed any time since your baseboard heater was originally installed. May be used for any reason when the overall height has been shortened and the total height is less than 7-½ inches for standard height or 9-½ inches for the TALL height EZ Snap™ BaseBoard Covers. Just use the self-tapping screws to secure them to the top of your existing wallplate.
EZ Snap™ Wall Contraptions are used when your wall back plate has been completely removed. EZ Snap™ Wall Contraptions receives your EZ Snap™ BaseBoard Cover and keeps your aluminum fin tube from sagging. These completely replace your wall back plate. To install, slide up from the bottom and make sure the top is at your desired height. Screw to the wall, then bend the front finger up to hold the fin tube in place.
Measure from wall to wall and subtract ½ inch (to allow for wiggle room when installing your new covers.) The endcaps can be pulled or slid ½ inch outward on either end to fit your existing length requirements. Choose 2 flush to wall end caps.
Measure the overall length of the existing unit with ends attached then subtract ½ inch (to allow for wiggle room when installing your new covers.) The endcaps can be pulled or slid ½ inch outward on either end to fit your existing length requirements. Choose 2 Closed or Open-end caps.
Measure from the corner to the end of the unit with ends attached then subtract ½ inch (to allow for wiggle room when installing your new covers.) The endcaps can be pulled or slid ½ inch outward on either end to fit your existing length requirements. Choose 1 Closed or Open-end & 1 flush to wall end cap.
Measure the left side from corner A to corner B (see diagram). Then subtract 3 inches for the 90 degree inside corner, then subtract another ½ inch (to allow for wiggle room when installing your new covers.) Repeat for the right side if also wall to wall. You need to subtract a total of 3½ inches from each side that is wall to wall. Choose your end caps.
Measure the left side from the corner of the wall to the end of the unit with ends caps. Then subtract 3 inches for the 90 degree inside corner, then subtract another ½ inch (to allow for wiggle room when installing your new covers.) Repeat for the right side. You need to subtract a total of 3½ inches from both left and right sides. Choose your end caps.
L-Shaped outside radiators ending in the middle of the wall:
Measure from outside corner of the wall A to the end of the radiator unit with end caps attached B, then subtract ½" (to allow for wiggle room when installing your new covers.)
Measure from outside corner of the wall to the corner of the wall, then subtract 1/2" (to allow for wiggle room when installing your new covers.)
Left leg - measure from the corner out to the end of the radiator subtract 3" for the corner and ½ (to allow for wiggle room when installing your new covers.)
Center leg - measure from corner to corner and subtract 3" for each corner a total of 6"
Right leg - measure from the corner out to the end of the radiator subtract 3" for the corner and ½" (to allow for wiggle room when installing your new covers.).
We recommend that you order covers a little longer than normal and cut them on site, as there are many opportunities for mistakes in measuring and installation. By cutting on site you can fit and cut to fit. The covers can be cut with a good quality jigsaw and a fine metal cutting blade.
Now that you’ve learned how to measure baseboard heaters,
you’re ready to order.