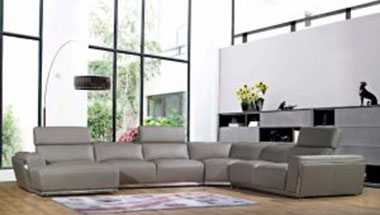
Summer is the season for home improvement. With longer days and warmer weather, homeowners naturally turn their attention to sprucing up their homes. According to a recent survey, 46% of Americans plan to tackle DIY projects or home remodeling this summer. Such projects can break the bank but they don’t have to. Here are four budget-friendly projects you can do yourself this summer to add style to your home.
Plenty of natural light
A dark room always seems smaller and less friendly. Of course the best way to brighten up a space is natural light. But there’s only so much you can do to let in extra sunlight. Installing a skylight on the roof or expanding the size of the windows in a room is outside the budget for the average homeowner. Fortunately, there’s a cheaper way. Since mirrors reflect sunlight, strategically place mirrors in the room across from windows so that natural light is reflected throughout the room. You’ll be surprised at how much larger and welcoming the room feels when there’s plenty of natural light.
Creative home décor
There are plenty of inexpensive ways to improve your home décor. If you’ve got a dining table and chairs that are showing their age, get a nice table cover and reupholster or re-stain the chairs. You can repaint an end table or repurpose antiques into functional furnishings. Another inexpensive idea is to purchase a Bundt pan that has some ornate detail and paint it a color you like. Then drill some holes on the sides and loop in some twine for hanging. Now you have a hanging planter for your kitchen. There are a million DIY home décor projects you can find online.
Gallery walls
Do you have a large, barren wall that you just don’t know what to do with? Collect some frames (they don’t have to match) and frame some art or photographs to create a gallery wall. You can easily display some three-dimensional pieces like antique saucers or other flat objects by removing the backing and glass on a frame and hanging the object on the wall within the frame’s borders. You can even hang some floating shelves to display sculptures, ceramics, or other collectibles.
The illusion of more space
Most homeowners make the mistake of hanging their curtains or drapes just an inch or two above their windows. You should actually hang your curtains up closer to the ceiling. Invest in some floor-to-ceiling window treatments and make sure they’re considerably wider than the window you’re covering. Oversized window treatments trick the eye into thinking the space is larger than it really is and even the illusions of more space is better than nothing.
Source: PR Newswire
1080 Bassett Rd Unit D
Westlake, OH 44145 USA
Phone:
866.740.0005
Fax:
888.717.9751
Email:
support@ezsnapcovers.com
© 2025 EZ Snap Covers.
Powered by Shopify
Measure the height from the floor to the top of the metal wall plate.
Follow our guide for baseboard heater cover measurement:
Any baseboard larger than 7 3/8" (188 mm) will be compatible with our standard cover.
Any measurement greater than 9 3/8" (238 mm) will fit our tall cover.
Measure from the bottom of the finned tube heating element to the top of the metal wall plate,
A measurement of 5 1/2" to 6 3/4" (140 mm – 172 mm) will fit our standard cover.
A measurement of 7 1/2" to 8 3/4" (191 mm – 222 mm) will fit our tall cover.
Measure the distance from the wall or the metal wall plate attached to the wall, to the outside of the finned tube heating element.
Any measurement of less than 3 1/8" (76 mm) inches from the wall will fit our
standard cover.
Any measurement of less than 3 1/8" (76 mm) inches from the wall will fit our tall cover.
EZ Snap™ Wall Widgets are used when your old or existing wall back plate has been removed or if you have to hang your new cover 1 inch or higher to bring them up to a height that will fit our installation guidelines. Just measure your overall desired height, subtract 1", drill a hole, preferably in a stud and attach it to the wall with the included screw.
EZ Snap™ Floor Fidgets easily raise your new covers ¾ inch to compensate for any ¾ inch floor (wood, tile, or other) that has been installed any time since your baseboard heater was originally installed. May be used for any reason when the overall height has been shortened and the total height is less than 7-½ inches for standard height or 9-½ inches for the TALL height EZ Snap™ BaseBoard Covers. Just use the self-tapping screws to secure them to the top of your existing wallplate.
EZ Snap™ Wall Contraptions are used when your wall back plate has been completely removed. EZ Snap™ Wall Contraptions receives your EZ Snap™ BaseBoard Cover and keeps your aluminum fin tube from sagging. These completely replace your wall back plate. To install, slide up from the bottom and make sure the top is at your desired height. Screw to the wall, then bend the front finger up to hold the fin tube in place.
Measure from wall to wall and subtract ½ inch (to allow for wiggle room when installing your new covers.) The endcaps can be pulled or slid ½ inch outward on either end to fit your existing length requirements. Choose 2 flush to wall end caps.
Measure the overall length of the existing unit with ends attached then subtract ½ inch (to allow for wiggle room when installing your new covers.) The endcaps can be pulled or slid ½ inch outward on either end to fit your existing length requirements. Choose 2 Closed or Open-end caps.
Measure from the corner to the end of the unit with ends attached then subtract ½ inch (to allow for wiggle room when installing your new covers.) The endcaps can be pulled or slid ½ inch outward on either end to fit your existing length requirements. Choose 1 Closed or Open-end & 1 flush to wall end cap.
Measure the left side from corner A to corner B (see diagram). Then subtract 3 inches for the 90 degree inside corner, then subtract another ½ inch (to allow for wiggle room when installing your new covers.) Repeat for the right side if also wall to wall. You need to subtract a total of 3½ inches from each side that is wall to wall. Choose your end caps.
Measure the left side from the corner of the wall to the end of the unit with ends caps. Then subtract 3 inches for the 90 degree inside corner, then subtract another ½ inch (to allow for wiggle room when installing your new covers.) Repeat for the right side. You need to subtract a total of 3½ inches from both left and right sides. Choose your end caps.
L-Shaped outside radiators ending in the middle of the wall:
Measure from outside corner of the wall A to the end of the radiator unit with end caps attached B, then subtract ½" (to allow for wiggle room when installing your new covers.)
Measure from outside corner of the wall to the corner of the wall, then subtract 1/2" (to allow for wiggle room when installing your new covers.)
Left leg - measure from the corner out to the end of the radiator subtract 3" for the corner and ½ (to allow for wiggle room when installing your new covers.)
Center leg - measure from corner to corner and subtract 3" for each corner a total of 6"
Right leg - measure from the corner out to the end of the radiator subtract 3" for the corner and ½" (to allow for wiggle room when installing your new covers.).
We recommend that you order covers a little longer than normal and cut them on site, as there are many opportunities for mistakes in measuring and installation. By cutting on site you can fit and cut to fit. The covers can be cut with a good quality jigsaw and a fine metal cutting blade.
Now that you’ve learned how to measure baseboard heaters,
you’re ready to order.