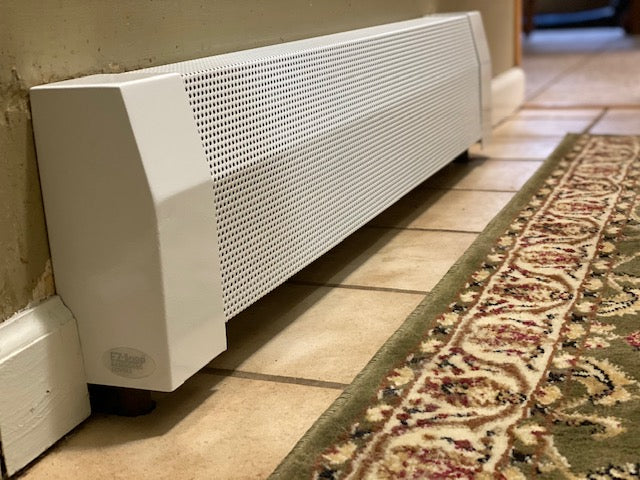
As the fall season quickly approaches and the summer heat begins to fade, it’s about the time when homeowners start the process of preparing for the months ahead. This often means packing away the patio furniture to performing a deep-clean of the home’s interior. But one of the more important tasks to complete before the temperature drops is prepping your baseboard hot water heating system. These units are crucial for keeping you comfortable in colder climates, and they should therefore be the main focus of your efforts at this time. This is how to prepare your baseboard hydronic heating system for cold weather to keep you warm no matter what nature throws your way.
When your baseboard heaters aren’t in use, clutter and furniture can easily surround them during the course of the year. However, when the time comes to finally start them up again, make sure you relocate anything that’s sitting up against your heater or cutting off the air flow.
Another important step to preparing your baseboard heating system for cold weather is to ensure that your boiler and related controls, hardware and thermostats are working and in tip top condition. Boilers and most all heating systems break or stop working when it's the coldest and under the most stress, not on a 50 degree winter afternoon. This said, boiler systems are not necessarily a DIY project and as such, it’s recommended that you reach out to professionals to get these units serviced and tuned up before fall officially begins.
Next, take some time to clean your heaters, inspect them for damage, and repair them should you notice any problems. Otherwise, you risk them yielding to the additional stress and not performing as efficiently as you want when you need them the most. This process requires you to remove your old baseboard heater covers and thoroughly vacuum them to remove any hair, lint, dust, or dander. From here, you can get a good look at all the internal components and to make sure everything is in proper order.
Once you know your heater is working properly, consider installing a new beautiful baseboard heater cover over it. These stylish covers form barriers over the hot heating coils and prevent you from coming into direct contact with them. This reduces the chances of sustaining an accidental burn, and it can even help the unit radiate heat more efficiently through additional ventilation holes.
We understand how much you rely on your baseboard heaters during the winter months. That’s why we at EZ Snap™ Covers want to provide you with the tools to ensure your heating systems run smoothly throughout the season. Our hot water baseboard covers are designed to fit perfectly over 95% of existing baseboard heaters, making them not only more effective and efficient, but also more stylish.
1080 Bassett Rd Unit D
Westlake, OH 44145 USA
Phone:
866.740.0005
Fax:
888.717.9751
Email:
support@ezsnapcovers.com
© 2024 EZ Snap Covers.
Powered by Shopify
Measure the height from the floor to the top of the metal wall plate.
Follow our guide for baseboard heater cover measurement:
Any baseboard larger than 7 3/8" (188 mm) will be compatible with our standard cover.
Any measurement greater than 9 3/8" (238 mm) will fit our tall cover.
Measure from the bottom of the finned tube heating element to the top of the metal wall plate,
A measurement of 5 1/2" to 6 3/4" (140 mm – 172 mm) will fit our standard cover.
A measurement of 7 1/2" to 8 3/4" (191 mm – 222 mm) will fit our tall cover.
Measure the distance from the wall or the metal wall plate attached to the wall, to the outside of the finned tube heating element.
Any measurement of less than 3 1/8" (76 mm) inches from the wall will fit our
standard cover.
Any measurement of less than 3 1/8" (76 mm) inches from the wall will fit our tall cover.
EZ Snap™ Wall Widgets are used when your old or existing wall back plate has been removed or if you have to hang your new cover 1 inch or higher to bring them up to a height that will fit our installation guidelines. Just measure your overall desired height, subtract 1", drill a hole, preferably in a stud and attach it to the wall with the included screw.
EZ Snap™ Floor Fidgets easily raise your new covers ¾ inch to compensate for any ¾ inch floor (wood, tile, or other) that has been installed any time since your baseboard heater was originally installed. May be used for any reason when the overall height has been shortened and the total height is less than 7-½ inches for standard height or 9-½ inches for the TALL height EZ Snap™ BaseBoard Covers. Just use the self-tapping screws to secure them to the top of your existing wallplate.
EZ Snap™ Wall Contraptions are used when your wall back plate has been completely removed. EZ Snap™ Wall Contraptions receives your EZ Snap™ BaseBoard Cover and keeps your aluminum fin tube from sagging. These completely replace your wall back plate. To install, slide up from the bottom and make sure the top is at your desired height. Screw to the wall, then bend the front finger up to hold the fin tube in place.
Measure from wall to wall and subtract ½ inch (to allow for wiggle room when installing your new covers.) The endcaps can be pulled or slid ½ inch outward on either end to fit your existing length requirements. Choose 2 flush to wall end caps.
Measure the overall length of the existing unit with ends attached then subtract ½ inch (to allow for wiggle room when installing your new covers.) The endcaps can be pulled or slid ½ inch outward on either end to fit your existing length requirements. Choose 2 Closed or Open-end caps.
Measure from the corner to the end of the unit with ends attached then subtract ½ inch (to allow for wiggle room when installing your new covers.) The endcaps can be pulled or slid ½ inch outward on either end to fit your existing length requirements. Choose 1 Closed or Open-end & 1 flush to wall end cap.
Measure the left side from corner A to corner B (see diagram). Then subtract 3 inches for the 90 degree inside corner, then subtract another ½ inch (to allow for wiggle room when installing your new covers.) Repeat for the right side if also wall to wall. You need to subtract a total of 3½ inches from each side that is wall to wall. Choose your end caps.
Measure the left side from the corner of the wall to the end of the unit with ends caps. Then subtract 3 inches for the 90 degree inside corner, then subtract another ½ inch (to allow for wiggle room when installing your new covers.) Repeat for the right side. You need to subtract a total of 3½ inches from both left and right sides. Choose your end caps.
L-Shaped outside radiators ending in the middle of the wall:
Measure from outside corner of the wall A to the end of the radiator unit with end caps attached B, then subtract ½" (to allow for wiggle room when installing your new covers.)
Measure from outside corner of the wall to the corner of the wall, then subtract 1/2" (to allow for wiggle room when installing your new covers.)
Left leg - measure from the corner out to the end of the radiator subtract 3" for the corner and ½ (to allow for wiggle room when installing your new covers.)
Center leg - measure from corner to corner and subtract 3" for each corner a total of 6"
Right leg - measure from the corner out to the end of the radiator subtract 3" for the corner and ½" (to allow for wiggle room when installing your new covers.).
We recommend that you order covers a little longer than normal and cut them on site, as there are many opportunities for mistakes in measuring and installation. By cutting on site you can fit and cut to fit. The covers can be cut with a good quality jigsaw and a fine metal cutting blade.
Now that you’ve learned how to measure baseboard heaters,
you’re ready to order.