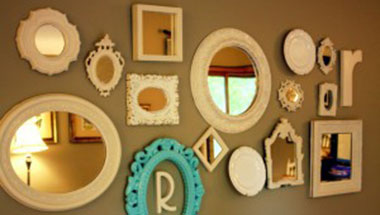
Selecting and hanging appropriate artwork for your home isn’t as easy as it sounds. Each piece should coordinate with the other pieces you have already selected, complement the style of the room, and be an appropriate size for the space you have available. If you’re not a professional art curator, the task of tastefully decorating your home might seem daunting. However, the experts at ApartmentTherapy.com have done their fair share of artwork selection and have come up with some tips on how to select and hang beautiful artwork in your home.
Complement the color palette
If you’ve never seen a color wheel, it would behoove you to look one up before trying to coordinate colors in your home. A color wheel can tell you what colors are complementary, which means you know which ones look best with each other. Colors situated directly across the color wheel from each other are "complements" which is why red and green look so good together-it’s not just because they symbolize Christmas and the holiday season. Similarly, blue and orange and yellow and purple are complementary pairs. Try to use color theory in your interior design.
Don’t hang them high (or low)
Appropriate height for pictures allows viewers to look at them comfortably without craning their necks up or having to bend down. ApartmentTherapy.com experts said, "Art that’s too high or low is a dead giveaway of a decorating rookie. Eye-level is the goal so, unless you hang out with a lot of giants, aim for the middle of your piece (not the hook, that will be higher) to be about 57" high. So if your picture is 30" tall, you would want to measure so the middle (15" from the top) is at 57". If the picture is hung by a wire, you would need to take into account the hang when you mark how high the hook needs to be.
Listen to your gut
Sometimes you end up with decorations or pieces of art you just don’t love. It’s hard to get rid of them though because they came from a good friend or you spent money on them. Sometimes there’s nothing wrong with the decoration, it just doesn’t fit your style or the wall you hung it on. Don’t ignore those feelings. Change what doesn’t seem right or else you’ll never be totally at peace in that room. ApartmentTherapy.com designers suggested, "Even if you spent time and money [on your artwork] . . . not addressing what you know isn’t working is costing you even more energy and satisfaction with your home.
Interior Decorating and Remodeling News Brought to You by EZSnapCovers.com
Source: http://www.artsconnected.org/toolkit/encyc_colorwheel.html
http://www.apartmenttherapy.com/interior-design-rookie-mistakes-196257
1080 Bassett Rd Unit D
Westlake, OH 44145 USA
Phone:
866.740.0005
Fax:
888.717.9751
Email:
support@ezsnapcovers.com
© 2024 EZ Snap Covers.
Powered by Shopify
Measure the height from the floor to the top of the metal wall plate.
Follow our guide for baseboard heater cover measurement:
Any baseboard larger than 7 3/8" (188 mm) will be compatible with our standard cover.
Any measurement greater than 9 3/8" (238 mm) will fit our tall cover.
Measure from the bottom of the finned tube heating element to the top of the metal wall plate,
A measurement of 5 1/2" to 6 3/4" (140 mm – 172 mm) will fit our standard cover.
A measurement of 7 1/2" to 8 3/4" (191 mm – 222 mm) will fit our tall cover.
Measure the distance from the wall or the metal wall plate attached to the wall, to the outside of the finned tube heating element.
Any measurement of less than 3 1/8" (76 mm) inches from the wall will fit our
standard cover.
Any measurement of less than 3 1/8" (76 mm) inches from the wall will fit our tall cover.
EZ Snap™ Wall Widgets are used when your old or existing wall back plate has been removed or if you have to hang your new cover 1 inch or higher to bring them up to a height that will fit our installation guidelines. Just measure your overall desired height, subtract 1", drill a hole, preferably in a stud and attach it to the wall with the included screw.
EZ Snap™ Floor Fidgets easily raise your new covers ¾ inch to compensate for any ¾ inch floor (wood, tile, or other) that has been installed any time since your baseboard heater was originally installed. May be used for any reason when the overall height has been shortened and the total height is less than 7-½ inches for standard height or 9-½ inches for the TALL height EZ Snap™ BaseBoard Covers. Just use the self-tapping screws to secure them to the top of your existing wallplate.
EZ Snap™ Wall Contraptions are used when your wall back plate has been completely removed. EZ Snap™ Wall Contraptions receives your EZ Snap™ BaseBoard Cover and keeps your aluminum fin tube from sagging. These completely replace your wall back plate. To install, slide up from the bottom and make sure the top is at your desired height. Screw to the wall, then bend the front finger up to hold the fin tube in place.
Measure from wall to wall and subtract ½ inch (to allow for wiggle room when installing your new covers.) The endcaps can be pulled or slid ½ inch outward on either end to fit your existing length requirements. Choose 2 flush to wall end caps.
Measure the overall length of the existing unit with ends attached then subtract ½ inch (to allow for wiggle room when installing your new covers.) The endcaps can be pulled or slid ½ inch outward on either end to fit your existing length requirements. Choose 2 Closed or Open-end caps.
Measure from the corner to the end of the unit with ends attached then subtract ½ inch (to allow for wiggle room when installing your new covers.) The endcaps can be pulled or slid ½ inch outward on either end to fit your existing length requirements. Choose 1 Closed or Open-end & 1 flush to wall end cap.
Measure the left side from corner A to corner B (see diagram). Then subtract 3 inches for the 90 degree inside corner, then subtract another ½ inch (to allow for wiggle room when installing your new covers.) Repeat for the right side if also wall to wall. You need to subtract a total of 3½ inches from each side that is wall to wall. Choose your end caps.
Measure the left side from the corner of the wall to the end of the unit with ends caps. Then subtract 3 inches for the 90 degree inside corner, then subtract another ½ inch (to allow for wiggle room when installing your new covers.) Repeat for the right side. You need to subtract a total of 3½ inches from both left and right sides. Choose your end caps.
L-Shaped outside radiators ending in the middle of the wall:
Measure from outside corner of the wall A to the end of the radiator unit with end caps attached B, then subtract ½" (to allow for wiggle room when installing your new covers.)
Measure from outside corner of the wall to the corner of the wall, then subtract 1/2" (to allow for wiggle room when installing your new covers.)
Left leg - measure from the corner out to the end of the radiator subtract 3" for the corner and ½ (to allow for wiggle room when installing your new covers.)
Center leg - measure from corner to corner and subtract 3" for each corner a total of 6"
Right leg - measure from the corner out to the end of the radiator subtract 3" for the corner and ½" (to allow for wiggle room when installing your new covers.).
We recommend that you order covers a little longer than normal and cut them on site, as there are many opportunities for mistakes in measuring and installation. By cutting on site you can fit and cut to fit. The covers can be cut with a good quality jigsaw and a fine metal cutting blade.
Now that you’ve learned how to measure baseboard heaters,
you’re ready to order.