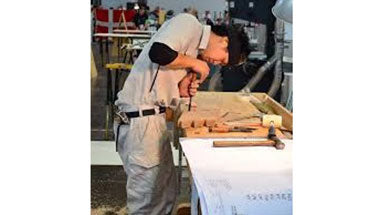
Thanks to Pinterest and television networks like DIY and HGTV, the do-it-yourself culture is very much alive and well. DIY remodeling and interior decorating can be a great way to save some money and it gives you the satisfaction of knowing that your beautiful home is solely the result of your hard work. But DIY isn’t right for everyone and it certainly isn’t right for all situations. So before you get carried away with your next DIY project, here are seven questions to ask yourself first.
How complex is your project?
Start by doing research-a lot of research to be sure that you fully understand the size and scope of the project you want to undertake. Use a variety of sources to gather your information and take careful notes. Understand what kind of expertise is required and think about whether you’d need to bring in subcontractors to do some of the work. Once you have an understanding of how complex the project is, you can have a better idea of whether it’s worth doing yourself.
Are there risks involved?
Repainting an old table to make it new again won’t harm your family, unless you’ve somehow managed to find lead-based paint from the early 70s. But attempting to reroute electrical, plumbing or gas lines or disturbing the structural integrity of your home can have dire consequences. If the job requires a permit or license, that’s a good sign you shouldn’t be doing it yourself, unless you happen to have that license. Never do a project that will risk you or your family’s safety.
Do you have the necessary experience and equipment?
It’s admirable to attempt a project yourself to save some money, but if you have no idea what you’re doing, you may want to reconsider. If a job will require expertise or special equipment that you don’t have, then you either need to invest some time and money in acquiring the necessary knowledge and equipment or else spend that money on a professional who already has it. If you go in without experience and the proper tools, chances are you’ll end up needing to bring in professional help anyways and you’ll end up wasting time and money.
What are your expectations of the project’s outcome?
If you want absolutely flawless results like you’ve seen in pictures you’ve found online, you may want to confront the reality that you may not achieve similar results if you do it yourself. Are you OK with results that are less than perfect so long as you achieve the satisfaction of knowing you did it yourself? If the answer is no, then plan on spending the money to hire a pro.
Are you okay redoing the project if you have to?
If you’re a person that really admires the process, perhaps even more so than the end result, you may be willing to redo a project if you don’t get the results you want. But if you really want it done right the first time then maybe a DIY project isn’t the answer.
Is it worth your time to do it?
Remember that time is also money. You should place a value on your time and have some realistic expectations going in about how much time it will take you to do the project yourself. Then get estimates from a remodeler or interior designer. Then you can ask yourself whether you’d rather have the time or the money.
Are you going to enjoy the process?
If you’re someone who hates the process and just wants the end result, then you may want to reconsider your DIY plan even if it has the potential to save you some money and you’re confident in your abilities. Sometimes it’s just worth avoiding the stress by letting someone else come in and do the work.
Source: Curbed
1080 Bassett Rd Unit D
Westlake, OH 44145 USA
Phone:
866.740.0005
Fax:
888.717.9751
Email:
support@ezsnapcovers.com
© 2024 EZ Snap Covers.
Powered by Shopify
Measure the height from the floor to the top of the metal wall plate.
Follow our guide for baseboard heater cover measurement:
Any baseboard larger than 7 3/8" (188 mm) will be compatible with our standard cover.
Any measurement greater than 9 3/8" (238 mm) will fit our tall cover.
Measure from the bottom of the finned tube heating element to the top of the metal wall plate,
A measurement of 5 1/2" to 6 3/4" (140 mm – 172 mm) will fit our standard cover.
A measurement of 7 1/2" to 8 3/4" (191 mm – 222 mm) will fit our tall cover.
Measure the distance from the wall or the metal wall plate attached to the wall, to the outside of the finned tube heating element.
Any measurement of less than 3 1/8" (76 mm) inches from the wall will fit our
standard cover.
Any measurement of less than 3 1/8" (76 mm) inches from the wall will fit our tall cover.
EZ Snap™ Wall Widgets are used when your old or existing wall back plate has been removed or if you have to hang your new cover 1 inch or higher to bring them up to a height that will fit our installation guidelines. Just measure your overall desired height, subtract 1", drill a hole, preferably in a stud and attach it to the wall with the included screw.
EZ Snap™ Floor Fidgets easily raise your new covers ¾ inch to compensate for any ¾ inch floor (wood, tile, or other) that has been installed any time since your baseboard heater was originally installed. May be used for any reason when the overall height has been shortened and the total height is less than 7-½ inches for standard height or 9-½ inches for the TALL height EZ Snap™ BaseBoard Covers. Just use the self-tapping screws to secure them to the top of your existing wallplate.
EZ Snap™ Wall Contraptions are used when your wall back plate has been completely removed. EZ Snap™ Wall Contraptions receives your EZ Snap™ BaseBoard Cover and keeps your aluminum fin tube from sagging. These completely replace your wall back plate. To install, slide up from the bottom and make sure the top is at your desired height. Screw to the wall, then bend the front finger up to hold the fin tube in place.
Measure from wall to wall and subtract ½ inch (to allow for wiggle room when installing your new covers.) The endcaps can be pulled or slid ½ inch outward on either end to fit your existing length requirements. Choose 2 flush to wall end caps.
Measure the overall length of the existing unit with ends attached then subtract ½ inch (to allow for wiggle room when installing your new covers.) The endcaps can be pulled or slid ½ inch outward on either end to fit your existing length requirements. Choose 2 Closed or Open-end caps.
Measure from the corner to the end of the unit with ends attached then subtract ½ inch (to allow for wiggle room when installing your new covers.) The endcaps can be pulled or slid ½ inch outward on either end to fit your existing length requirements. Choose 1 Closed or Open-end & 1 flush to wall end cap.
Measure the left side from corner A to corner B (see diagram). Then subtract 3 inches for the 90 degree inside corner, then subtract another ½ inch (to allow for wiggle room when installing your new covers.) Repeat for the right side if also wall to wall. You need to subtract a total of 3½ inches from each side that is wall to wall. Choose your end caps.
Measure the left side from the corner of the wall to the end of the unit with ends caps. Then subtract 3 inches for the 90 degree inside corner, then subtract another ½ inch (to allow for wiggle room when installing your new covers.) Repeat for the right side. You need to subtract a total of 3½ inches from both left and right sides. Choose your end caps.
L-Shaped outside radiators ending in the middle of the wall:
Measure from outside corner of the wall A to the end of the radiator unit with end caps attached B, then subtract ½" (to allow for wiggle room when installing your new covers.)
Measure from outside corner of the wall to the corner of the wall, then subtract 1/2" (to allow for wiggle room when installing your new covers.)
Left leg - measure from the corner out to the end of the radiator subtract 3" for the corner and ½ (to allow for wiggle room when installing your new covers.)
Center leg - measure from corner to corner and subtract 3" for each corner a total of 6"
Right leg - measure from the corner out to the end of the radiator subtract 3" for the corner and ½" (to allow for wiggle room when installing your new covers.).
We recommend that you order covers a little longer than normal and cut them on site, as there are many opportunities for mistakes in measuring and installation. By cutting on site you can fit and cut to fit. The covers can be cut with a good quality jigsaw and a fine metal cutting blade.
Now that you’ve learned how to measure baseboard heaters,
you’re ready to order.