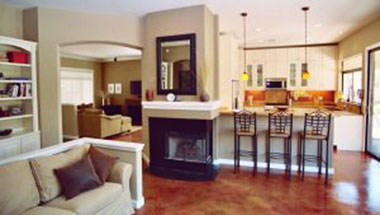
There’s something about a cluttered space that makes it difficult to enjoy things you usually love. Everything is better when the home is clutter-free and nice looking. Here are some easy tips that will keep your home clutter-free and happier.
The biggest mistake
The biggest mistake that homeowners make when trying to declutter their homes is that they try to organize the clutter before decluttering. It ends up being a lot of wasted effort. Homeowners can waste hours trying to organize and may even waste some money on bins and baskets to make room for it all. A better way is to declutter first. Before worrying about organization, just go through everything you own and decide what to throw out. Once you’ve gotten rid of a good percentage of your things, then you’ll have a much easier time trying to organize what’s left.
The best place to start
One of the things that stops homeowners from tackling the mess is that just the thought is overwhelming and they don’t even know where to start. You have to start out somewhere and the entryway is a good start since that’s the first thing that people see when they come into the home. It’s also the place where everyone in the household drops their stuff right when they come in. Set up specific places to put mail, backpacks, shoes, homework, and keys. When there’s an assigned place for all the biggest culprits clutter will be less of a problem.
Improving the entryway
In addition to decluttering the entryway, you can also make it more welcoming. Repaint the front door. Fin d anew rug or seasonal doormat. Add some creative storage organizers like crates, rows of hooks, and closed freestanding cabinets. If you don’t already have a lamp in the entryway, put one there to add some ambiance.
Staying on top of the clutter
The problem with clutter is that it seems to multiply all on its own. It might seem like you have to start again as soon as you’ve finished. There will always be clutter but the best way to stay on top of it is to get in the habit of putting away items you’ve used as soon as you’re finished with them. It’s simple advice that you’ve been told since you were a kid but there’s wisdom to it. It only takes one day of not cleaning up after yourself to fall way behind.
Adding storage space
Finding a place for everything can be a real challenge especially if your home is on the small side. It may mean that you need to get creative with storage space. As much as possible, try to keep things hidden from view. Even if things have an assigned place, it too many things are out in the open in still appears cluttered. Invest in some lidded bins. Ottomans that double as storage are great as well.
Source: Patch
1080 Bassett Rd Unit D
Westlake, OH 44145 USA
Phone:
866.740.0005
Fax:
888.717.9751
Email:
support@ezsnapcovers.com
© 2024 EZ Snap Covers.
Powered by Shopify
Measure the height from the floor to the top of the metal wall plate.
Follow our guide for baseboard heater cover measurement:
Any baseboard larger than 7 3/8" (188 mm) will be compatible with our standard cover.
Any measurement greater than 9 3/8" (238 mm) will fit our tall cover.
Measure from the bottom of the finned tube heating element to the top of the metal wall plate,
A measurement of 5 1/2" to 6 3/4" (140 mm – 172 mm) will fit our standard cover.
A measurement of 7 1/2" to 8 3/4" (191 mm – 222 mm) will fit our tall cover.
Measure the distance from the wall or the metal wall plate attached to the wall, to the outside of the finned tube heating element.
Any measurement of less than 3 1/8" (76 mm) inches from the wall will fit our
standard cover.
Any measurement of less than 3 1/8" (76 mm) inches from the wall will fit our tall cover.
EZ Snap™ Wall Widgets are used when your old or existing wall back plate has been removed or if you have to hang your new cover 1 inch or higher to bring them up to a height that will fit our installation guidelines. Just measure your overall desired height, subtract 1", drill a hole, preferably in a stud and attach it to the wall with the included screw.
EZ Snap™ Floor Fidgets easily raise your new covers ¾ inch to compensate for any ¾ inch floor (wood, tile, or other) that has been installed any time since your baseboard heater was originally installed. May be used for any reason when the overall height has been shortened and the total height is less than 7-½ inches for standard height or 9-½ inches for the TALL height EZ Snap™ BaseBoard Covers. Just use the self-tapping screws to secure them to the top of your existing wallplate.
EZ Snap™ Wall Contraptions are used when your wall back plate has been completely removed. EZ Snap™ Wall Contraptions receives your EZ Snap™ BaseBoard Cover and keeps your aluminum fin tube from sagging. These completely replace your wall back plate. To install, slide up from the bottom and make sure the top is at your desired height. Screw to the wall, then bend the front finger up to hold the fin tube in place.
Measure from wall to wall and subtract ½ inch (to allow for wiggle room when installing your new covers.) The endcaps can be pulled or slid ½ inch outward on either end to fit your existing length requirements. Choose 2 flush to wall end caps.
Measure the overall length of the existing unit with ends attached then subtract ½ inch (to allow for wiggle room when installing your new covers.) The endcaps can be pulled or slid ½ inch outward on either end to fit your existing length requirements. Choose 2 Closed or Open-end caps.
Measure from the corner to the end of the unit with ends attached then subtract ½ inch (to allow for wiggle room when installing your new covers.) The endcaps can be pulled or slid ½ inch outward on either end to fit your existing length requirements. Choose 1 Closed or Open-end & 1 flush to wall end cap.
Measure the left side from corner A to corner B (see diagram). Then subtract 3 inches for the 90 degree inside corner, then subtract another ½ inch (to allow for wiggle room when installing your new covers.) Repeat for the right side if also wall to wall. You need to subtract a total of 3½ inches from each side that is wall to wall. Choose your end caps.
Measure the left side from the corner of the wall to the end of the unit with ends caps. Then subtract 3 inches for the 90 degree inside corner, then subtract another ½ inch (to allow for wiggle room when installing your new covers.) Repeat for the right side. You need to subtract a total of 3½ inches from both left and right sides. Choose your end caps.
L-Shaped outside radiators ending in the middle of the wall:
Measure from outside corner of the wall A to the end of the radiator unit with end caps attached B, then subtract ½" (to allow for wiggle room when installing your new covers.)
Measure from outside corner of the wall to the corner of the wall, then subtract 1/2" (to allow for wiggle room when installing your new covers.)
Left leg - measure from the corner out to the end of the radiator subtract 3" for the corner and ½ (to allow for wiggle room when installing your new covers.)
Center leg - measure from corner to corner and subtract 3" for each corner a total of 6"
Right leg - measure from the corner out to the end of the radiator subtract 3" for the corner and ½" (to allow for wiggle room when installing your new covers.).
We recommend that you order covers a little longer than normal and cut them on site, as there are many opportunities for mistakes in measuring and installation. By cutting on site you can fit and cut to fit. The covers can be cut with a good quality jigsaw and a fine metal cutting blade.
Now that you’ve learned how to measure baseboard heaters,
you’re ready to order.