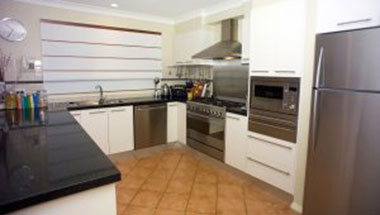
We have all heard horror stories about kitchen remodeling projects, which is often enough to sway most of us away from the idea of remodeling our kitchens. The truth is, remodeling your kitchen does not have to be a terrible experience, and it does not have to drain your savings account. We live in a world of DIY projects, and no matter where you lie on the creativity scale, there are several projects you can complete without a professional for much less money than you would think they would cost. Here are some ways you can ensure that your kitchen remodel is a success.
Creating a plan
In order for your kitchen remodeling project to be successful, you first have to steer away from the idea of having everything in your kitchen custom made. Consider working with what you already have in order to save money. Create a solid budget, and stick to it. If something does not fit into your budget, you do not need it. Conduct heavy research so you find your materials for the best prices, and wait for materials to go on sale before you purchase them. Lastly, before any construction starts, make sure you have a system in place for how you and your family will access the necessities without getting hurt by or in the way of construction.
Considering functionality
It is easy to become overwhelmed when choosing which upgrades to install into your kitchen. The easiest way to decide which upgrades your kitchen needs is by making sure each upgrade makes your kitchen more functional. Decoholic recommends that you always put functionality ahead of the décor and fashion of your kitchen, because you will definitely appreciate convenience over beauty, especially if you spend most of your time in your kitchen. Avoid crazy shapes and colors as they will surly go in and out of style quickly, and you will spend even more money trying to modernize them. Stick to classic looks, and focus on functionality.
Upgrades worth investment
Whether or not you are planning on selling your home, you should always make sure your kitchen upgrades increase the value of your home, and that means investing money in certain upgrades. Wood flooring will always increase the value of a home, as well as granite counter tops and stainless steel appliances. While these upgrades are costly, the will always be in style, and they will greatly increase the value of your home, not to mention they are known to stand the tests of time. If you want to put most of your budget towards upgrades like these, consider minor upgrades that are less money such as simply painting your cabinets and updating the hardware to give your kitchen a new and updated look while allowing most of your budget to go towards the expensive upgrades.
Interior decorating and remodeling news brought to you by EZSnapCovers.com
Source: decoholic.org/2013/08/13/the-secrets-to-a-successful-kitchen-remodeling/
1080 Bassett Rd Unit D
Westlake, OH 44145 USA
Phone:
866.740.0005
Fax:
888.717.9751
Email:
support@ezsnapcovers.com
© 2024 EZ Snap Covers.
Powered by Shopify
Measure the height from the floor to the top of the metal wall plate.
Follow our guide for baseboard heater cover measurement:
Any baseboard larger than 7 3/8" (188 mm) will be compatible with our standard cover.
Any measurement greater than 9 3/8" (238 mm) will fit our tall cover.
Measure from the bottom of the finned tube heating element to the top of the metal wall plate,
A measurement of 5 1/2" to 6 3/4" (140 mm – 172 mm) will fit our standard cover.
A measurement of 7 1/2" to 8 3/4" (191 mm – 222 mm) will fit our tall cover.
Measure the distance from the wall or the metal wall plate attached to the wall, to the outside of the finned tube heating element.
Any measurement of less than 3 1/8" (76 mm) inches from the wall will fit our
standard cover.
Any measurement of less than 3 1/8" (76 mm) inches from the wall will fit our tall cover.
EZ Snap™ Wall Widgets are used when your old or existing wall back plate has been removed or if you have to hang your new cover 1 inch or higher to bring them up to a height that will fit our installation guidelines. Just measure your overall desired height, subtract 1", drill a hole, preferably in a stud and attach it to the wall with the included screw.
EZ Snap™ Floor Fidgets easily raise your new covers ¾ inch to compensate for any ¾ inch floor (wood, tile, or other) that has been installed any time since your baseboard heater was originally installed. May be used for any reason when the overall height has been shortened and the total height is less than 7-½ inches for standard height or 9-½ inches for the TALL height EZ Snap™ BaseBoard Covers. Just use the self-tapping screws to secure them to the top of your existing wallplate.
EZ Snap™ Wall Contraptions are used when your wall back plate has been completely removed. EZ Snap™ Wall Contraptions receives your EZ Snap™ BaseBoard Cover and keeps your aluminum fin tube from sagging. These completely replace your wall back plate. To install, slide up from the bottom and make sure the top is at your desired height. Screw to the wall, then bend the front finger up to hold the fin tube in place.
Measure from wall to wall and subtract ½ inch (to allow for wiggle room when installing your new covers.) The endcaps can be pulled or slid ½ inch outward on either end to fit your existing length requirements. Choose 2 flush to wall end caps.
Measure the overall length of the existing unit with ends attached then subtract ½ inch (to allow for wiggle room when installing your new covers.) The endcaps can be pulled or slid ½ inch outward on either end to fit your existing length requirements. Choose 2 Closed or Open-end caps.
Measure from the corner to the end of the unit with ends attached then subtract ½ inch (to allow for wiggle room when installing your new covers.) The endcaps can be pulled or slid ½ inch outward on either end to fit your existing length requirements. Choose 1 Closed or Open-end & 1 flush to wall end cap.
Measure the left side from corner A to corner B (see diagram). Then subtract 3 inches for the 90 degree inside corner, then subtract another ½ inch (to allow for wiggle room when installing your new covers.) Repeat for the right side if also wall to wall. You need to subtract a total of 3½ inches from each side that is wall to wall. Choose your end caps.
Measure the left side from the corner of the wall to the end of the unit with ends caps. Then subtract 3 inches for the 90 degree inside corner, then subtract another ½ inch (to allow for wiggle room when installing your new covers.) Repeat for the right side. You need to subtract a total of 3½ inches from both left and right sides. Choose your end caps.
L-Shaped outside radiators ending in the middle of the wall:
Measure from outside corner of the wall A to the end of the radiator unit with end caps attached B, then subtract ½" (to allow for wiggle room when installing your new covers.)
Measure from outside corner of the wall to the corner of the wall, then subtract 1/2" (to allow for wiggle room when installing your new covers.)
Left leg - measure from the corner out to the end of the radiator subtract 3" for the corner and ½ (to allow for wiggle room when installing your new covers.)
Center leg - measure from corner to corner and subtract 3" for each corner a total of 6"
Right leg - measure from the corner out to the end of the radiator subtract 3" for the corner and ½" (to allow for wiggle room when installing your new covers.).
We recommend that you order covers a little longer than normal and cut them on site, as there are many opportunities for mistakes in measuring and installation. By cutting on site you can fit and cut to fit. The covers can be cut with a good quality jigsaw and a fine metal cutting blade.
Now that you’ve learned how to measure baseboard heaters,
you’re ready to order.